That effort is the story. A landscape photography POV video tells it: the approach hike, the tripod setup in the dark, the wait, the light arriving, the moment you fire the shutter — and then the photograph itself, placed automatically at that exact second in the GoPro footage by EXIF timestamp matching in POV Syncer. Your audience sees what the image cost. The photograph becomes what it actually is: the result of planning, patience, and timing.
This guide covers the full landscape photography POV workflow: mounting options for the approach and the static setup, which cameras produce the most reliable EXIF data for matching, and the exact steps in POV Syncer that replace hours of manual timeline editing with a process that takes seconds.
What Landscape Photography POV Videos Are
A landscape photography POV video combines your action cam footage of the session — the hike, the setup, the wait, the conditions — with your tripod-camera still photographs, placed at their exact EXIF timestamps within the footage. The viewer experiences the session from your perspective, with the landscape photograph appearing at the precise moment you triggered the shutter.
For long-exposure landscape photography, the format has a particularly satisfying structure: the footage shows you setting up the ND filter stack, dialling in the exposure, checking the composition — then the long-exposure image appears, compressing 30 seconds of real time into a single still frame. The contrast between the moving world the action cam shows and the perfectly still landscape the shutter captured is the essence of the format.
Why Landscape Photographers Benefit Most from This Format
Landscape photography generates less regular content than most other photography genres because the sessions are infrequent, weather-dependent, and time-consuming. A landscape photographer might produce 10 finished images from a full day in the field. Without the behind-the-scenes story, those 10 images are difficult to build regular content around.
The POV format changes this equation dramatically. Each session — regardless of how many finished images it produces — generates a complete narrative video. Even a session that produces only 2 excellent photographs has a compelling behind-the-scenes story if those photographs were preceded by a 40-minute pre-dawn hike and 90 minutes of waiting for the right light.
Three specific benefits:
- Contextualise the conditions. A photograph of a mountain lake at sunrise doesn't show the mist lifting, the wind that threatened to move the water in the wrong direction, the 10-minute window when the light was exactly right. The POV video shows all of it.
- Teach location and technique simultaneously. A narrated POV video covering the location choice, the composition reasoning, the exposure settings, and the final result is the complete landscape photography tutorial — more instructive than any separate elements.
- Build audience through the journey, not just the image. YouTube landscape photography channels with strong BTS content consistently outperform those that only post finished images. The story of getting to the shot is as engaging as the shot itself.
Pick Your POV Camera for Landscape Work
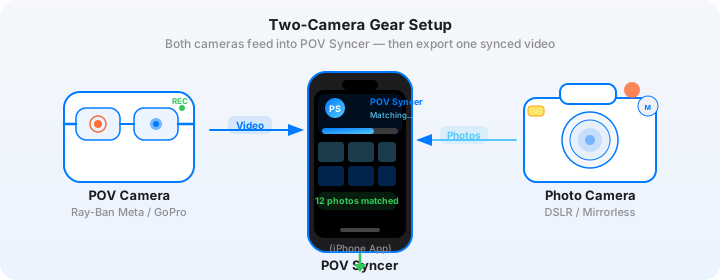
GoPro Hero 13 — Chest Mount for the Approach
For the approach hike, a chest-mounted GoPro Hero 13 is the natural choice — 4K/60fps, HyperSmooth stabilisation for rough terrain, and GPS recording for accurate EXIF matching. Set to Wide FOV, GPS On, HyperSmooth Standard. This captures the journey context that makes the eventual landscape photograph meaningful.
GoPro on a Tripod Cold Shoe — Static Shooting Position
Once at your composition point, move the GoPro from the chest harness to a cold shoe adapter on your tripod head or a small mini tripod nearby. This gives a fixed perspective on you working — composing, checking exposure, adjusting filters — that contrasts nicely with the movement of the approach footage in the final video.
DJI Action 5 Pro — Best Dynamic Range for Landscape Light
The DJI Action 5 Pro's flat colour profile and broader dynamic range handles the extreme contrast of golden hour and blue hour better than the GoPro's default colour profile. For landscape footage that you want to grade alongside the landscape photographs, the DJI gives you more latitude.
Insta360 X4 — 360-Degree Reframe
The Insta360 X4 placed on a small stand at your composition point captures 360-degree video that you can reframe in post to any direction — showing the scene behind you while you're looking through the viewfinder, for example. Useful for dramatic location content where the view in every direction is visually interesting.
The Gear: Action Cam + Landscape Camera
GoPro Hero 13 + Nikon Zf with Z 24-70mm f/4 S
The Nikon Zf is the landscape photographer's camera for 2026 — its 24.5MP full-frame sensor with outstanding dynamic range, IBIS, and weathersealing makes it exceptional for demanding outdoor conditions. The analogue controls make on-the-fly exposure adjustment intuitive in the field. The Z 24-70mm f/4 S covers the most-used landscape focal lengths in a compact, weathersealed package.
EXIF settings for the Zf: Set UTC offset in Menu → Setup → World Time. Enable location data via the SnapBridge app for GPS-coordinate EXIF. Settings: RAW + JPEG, Manual exposure, ISO 64 base for maximum dynamic range, f/8-f/11 for landscape depth of field, shutter speed adjusted for conditions (1/200s minimum handheld; any speed on tripod).
DJI Action 5 Pro + Sony A7C II with FE 16-35mm f/2.8 GM II
The Sony A7C II's 33MP full-frame sensor with excellent shadow detail is a strong landscape camera. The FE 16-35mm f/2.8 GM II covers ultra-wide to moderate wide landscape frames with consistently sharp results corner-to-corner. Connect to Sony Imaging Edge Mobile before the session for GPS clock sync. This is a heavier kit than the Nikon Zf combination but produces exceptionally detailed landscape images.
GoPro Hero 13 + Canon R6 Mark III with RF 15-35mm f/2.8L IS
Canon's RF 15-35mm f/2.8L IS with image stabilisation is uniquely useful for landscape photographers who want to shoot wide-angle handheld in low light — the IS allows sharp exposures at 1/8s handheld at 15mm. The Canon R6 Mark III's high-ISO performance (ISO 25600 with excellent usable quality) extends the blue hour shooting window significantly.
The Hours of Editing — Replaced by Seconds
Landscape photography behind-the-scenes editing is particularly tedious because the sessions are long and the stills are widely spaced in time. A 3-hour golden hour session might produce 25 finished photographs spread across 3 hours of footage. Finding each one manually — scrubbing through footage looking for the moment you pressed the shutter — is 30 minutes of pure housework per photograph minimum. For 25 photographs, that's 12 hours of editing.
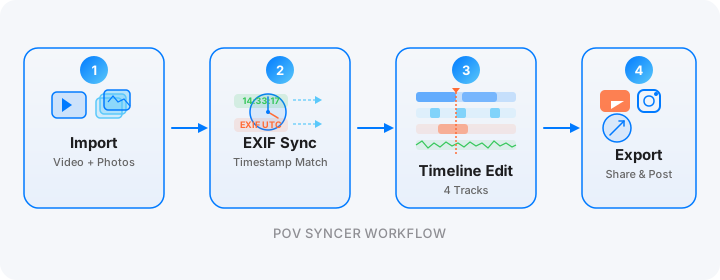
POV Syncer's EXIF matching handles all 25 in a single pass. The four-strategy cascade reads every photograph's timestamp and places it in the correct second of GoPro footage. Total matching time: approximately 10 seconds. Review time: about 8 minutes for 25 photographs. You're done before the GoPro battery has run flat.
In the App: Step by Step


On the timeline: add a title overlay showing the exposure data for each photograph ("2s f/11 ISO 64 — 16mm, Circular ND 10-stop"). Add a brief AI narration — 20 seconds describing the light conditions, the location, and what you were waiting for. Export 16:9 for YouTube landscape content, or 9:16 for Reels.
Show the journey, not just the destination
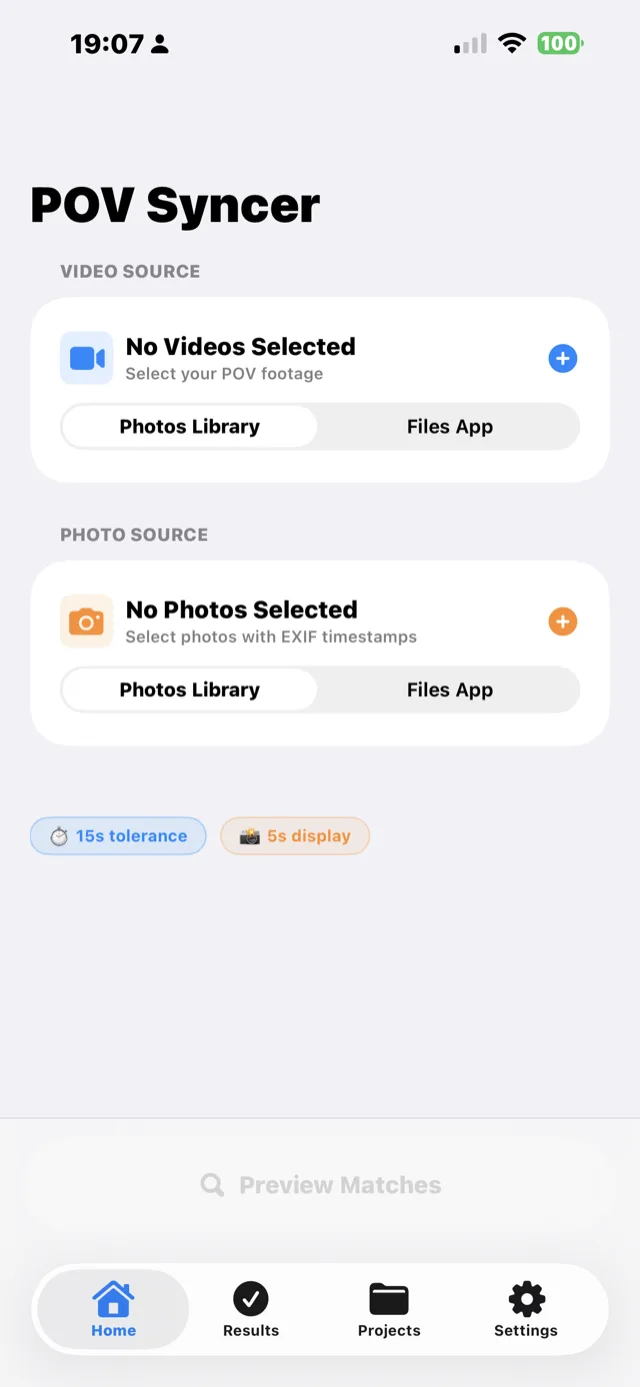
POV Syncer is free during beta. Import your GoPro approach footage and your landscape stills. Automatic EXIF matching places every photograph at the moment of capture — in seconds.
Download POV Syncer FreeWorks on iPhone, iPad, and Mac
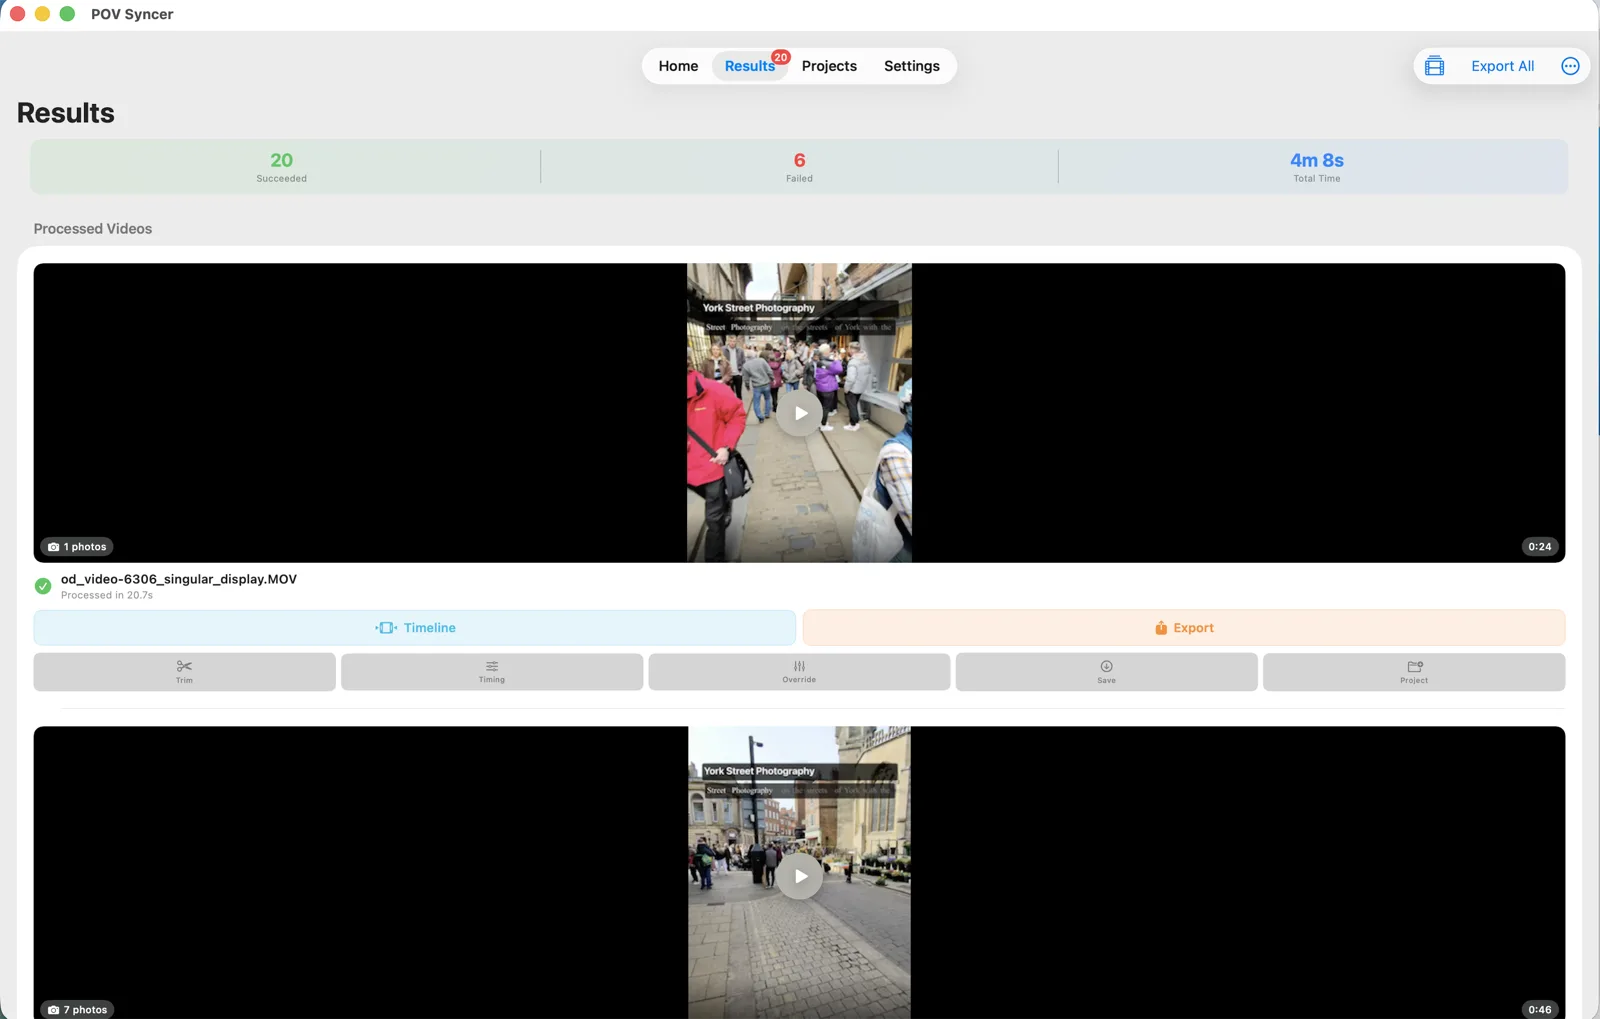
For landscape photographers, the Mac workflow is often most practical: import GoPro clips from an SD card reader, import landscape JPEGs from the camera card, let POV Syncer match and process, then use the full-width timeline editor to add narration and titles before exporting. The entire workflow fits in a single evening session at home.
Under the Hood: EXIF Matching for Pre-Dawn and Low-Light Sessions
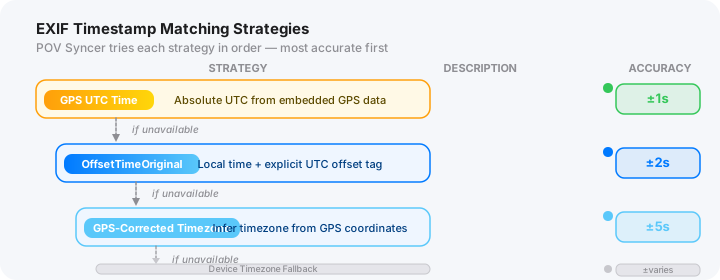
Landscape photography has specific EXIF considerations. Pre-dawn sessions in remote locations might have no mobile signal for clock sync. Long sessions in cold weather can cause slight battery-related clock drift. The GPS UTC strategy handles both:
- GPS UTC on both cameras — GoPro Hero 13 GPS records absolute UTC time from the satellite network, unaffected by mobile signal. With Nikon Zf SnapBridge location sync or Sony Imaging Edge Mobile synced before leaving the car, both cameras use GPS UTC as their reference. POV Syncer's first strategy matches them perfectly.
- Per-video timing offset — if your stills camera clock is consistently behind the GoPro by 3 seconds (common if SnapBridge sync was done earlier in the day and the camera drifted overnight), a single offset correction applies to all clips from that session.
- Adjustable tolerance — for long-exposure landscape photography, ±5 to ±10 seconds tolerance is appropriate, since a 30-second exposure has a natural timestamp spread.
Six Tips for Landscape Photography POV Videos
1. Start Recording Before You Leave the Car
The story of a landscape session starts at the car park, not at the composition point. The GoPro footage of the approach — including any challenging terrain, interesting weather, pre-dawn darkness — contextualises the eventual photograph more effectively than footage that begins at your tripod position. Start recording as you leave the car. Battery life is rarely a problem for approach walks under 45 minutes.
2. Use a Cold Shoe Adapter at the Composition Point
Once set up, move the GoPro from the chest harness to a small cold shoe adapter on your tripod head, pointing roughly forward at the scene. This gives viewers a static shot of you working — checking the composition, adjusting the filter, triggering the shutter — that has a very different visual quality to the walking footage. The combination of movement (approach) and stillness (composition) mirrors the structure of landscape photography itself.
3. Show the Filter Setup
Screw-in ND filters and filter holder systems are genuinely mysterious to non-photographers. A 30-second sequence of attaching a filter holder and stacking ND filters is fascinating content that directly explains why a long-exposure landscape photograph looks the way it does. Make sure the action cam is positioned to show your hands during this sequence.
4. Use the Exposure Data Title Track
For landscape photography YouTube content, viewers want the exposure data. Use POV Syncer's title track to overlay the exposure for each photograph: "30s | f/11 | ISO 64 | 24mm | Graduated ND + 6-stop ND". This information appears as text over the footage just before the photograph appears — so viewers know the settings before they see the result.
5. Batch Your Seasons
Process a full season of landscape sessions at once using POV Syncer's batch process and Export All to Photos features. Creating a "Autumn 2026" batch export gives you 8 to 12 individual behind-the-scenes videos from a season's worth of sessions, ready to distribute as a weekly content series. The batch process runs while you sleep.
6. Add Location Coordinates to the Title Track
Landscape photography audiences love knowing exactly where an image was taken. Use the title track to add "53.4°N, 3.0°W — Snowdonia, Wales" or the common location name. This serves both as content (viewers who recognise or want to visit the location engage more) and as SEO (geographic keywords in the video description boost search discovery).