A behind-the-scenes POV video from a portrait session shows what actually happens between you and your subject — the direction, the lighting adjustments, the moments you don't press the shutter as much as the ones you do. And when the photograph appears at its exact EXIF timestamp in the footage, viewers understand the relationship between all that visible process and the one still frame that distils it.
POV Syncer makes this automatic. Import your action cam footage and your portrait camera stills. EXIF matching places every photograph at its precise moment in the session footage. What used to require hours of manual scrubbing in Premiere happens in seconds. You spend the saved time shooting, not editing.
What Portrait Photography POV Videos Look Like
The format adapts naturally to different portrait contexts — studio headshots, editorial, lifestyle, location work. In each case, the structure is the same: you see the setup, the direction, the process, then the photograph appears at the exact moment of capture.
For a studio headshot session: footage of the lighting configuration, the subject arriving, your direction ("chin slightly forward, eyes just past the lens"), then the portrait appears — and viewers immediately see the relationship between the direction and the resulting expression.
For editorial work: footage of the location scouting, the model in position, the light check, then the fashion photograph appears within the footage of the context that made it possible.
For location lifestyle portraits: footage of finding the spot, framing through the viewfinder, waiting for the right moment — then the portrait. The narrative arc of finding → preparing → capturing is the story of every great portrait session.
Why Portrait Photographers Need This Content
Portrait photography is one of the most commercially driven photography disciplines — almost every portrait photographer is also, whether they like it or not, a small business. BTS content is direct business content, not just audience-building content:
- Pre-qualify clients. Prospective clients who watch your BTS video before booking understand exactly what to expect from a session — your communication style, your lighting approach, the amount of direction you provide. They arrive prepared and confident.
- Demonstrate the value of professional photography. A 60-second BTS Reel showing the lighting setup, the direction, and the resulting photograph answers the "why can't I just use my phone?" question more effectively than any explanation.
- Educate other photographers. BTS content from professional portrait sessions is among the most-watched photography content on YouTube and Instagram. Your process — even if you've been doing it for years and think it's ordinary — is genuinely instructive to photographers building their practice.
- Relive and refine your approach. Watching yourself direct a subject is uncomfortable at first and invaluable thereafter. You notice patterns, hesitations, and opportunities you're not aware of in the moment.
Pick Your Action Cam Setup for Portrait Work
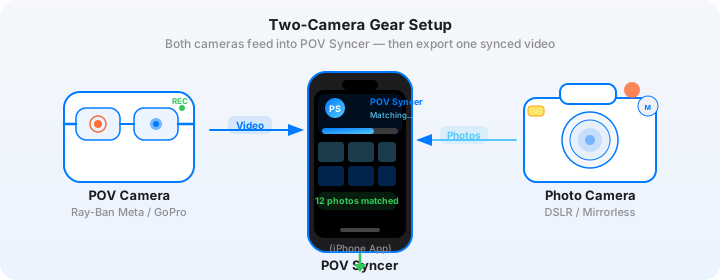
Hot-Shoe Mounted Action Cam (Most Camera-Perspective)
A SmallRig cold shoe arm clipped to your camera's hot shoe, with an Insta360 GO 3S or small GoPro on top, gives footage from almost exactly the camera's perspective. When the portrait appears in POV Syncer, viewers see the subject from the same angle the photograph was taken. This is the most instructive setup for photographers who want to teach — viewers understand exactly what the 85mm framing looks like versus the 50mm environmental shot.
Chest Harness (Broader Studio View)
A chest-mounted GoPro or DJI Action cam sees more of the studio — the lighting positions, the rapport between you and your subject, your body language and direction. For content aimed at prospective clients rather than photographers, the chest view shows the session experience more fully than the narrow camera-perspective view. Many portrait photographers use both: camera-mounted for photographer-audience content, chest-mounted for client-audience content.
360-Degree Camera (Reframe for Any Angle)
An Insta360 X4 on a small stand in the corner of the studio captures the entire session from a fixed position. You can then reframe in post to any angle — the camera to subject, the lighting, your side profile, the subject's perspective. The trade-off is that the footage requires more post-processing time than a direct action cam setup.
Ray-Ban Meta (Location and Environmental Portraits)
For location portrait sessions — parks, urban environments, architectural backgrounds — Ray-Ban Meta glasses give you inconspicuous eye-level footage that doesn't interfere with the subject. The subject doesn't see a camera pointing at them from your chest; they see you looking at them. This is particularly valuable for lifestyle portraits where natural subject behaviour matters.
The Gear: Action Cam + Portrait Camera
Insta360 GO 3S + Sony A7R V
The Sony A7R V at 61MP is the highest-resolution portrait camera in common professional use — its per-pixel detail at large print sizes is exceptional. The 85mm f/1.4 GM II lens resolves extraordinary three-dimensional rendering on the full-frame sensor. The GO 3S mounted on the camera hot shoe via a SmallRig arm gives you footage from almost exactly the 85mm perspective. When the portrait appears in the POV Syncer timeline, viewers understand the compression and bokeh produced by the lens because the action cam footage shows the working distance.
Sony's EXIF data is comprehensive. Connect to Sony Imaging Edge Mobile before the session and sync the clock via GPS for precise EXIF matching. Settings: RAW + JPEG, f/1.8 or f/2 for most portrait work (sharp at both, with good subject separation), 1/160s minimum for studio flash sync, ISO 100 for strobes.
GoPro Hero 13 + Fujifilm X-T5
The Fujifilm X-T5 at 40.2MP APS-C is the studio portrait camera that many professional photographers choose specifically for the film simulation quality of its JPEG output — Eterna Cinema for video-like portraits, Classic Chrome for a muted editorial look, Astia for soft, flattering skin tones. The X-T5 paired with the XF 56mm f/1.2 R APD (the apodisation element producing extraordinary bokeh) gives portrait results that are distinctive and immediately recognisable as Fujifilm.
Enable Fujifilm XApp location sync for GPS-accurate EXIF matching. The X-T5's OffsetTimeOriginal EXIF field is reliably written when UTC offset is set correctly.
DJI Action 5 Pro + Canon R5 with RF 85mm f/1.2L
Canon's RF 85mm f/1.2L is widely regarded as the finest portrait prime available for a mirrorless system. On the Canon R5's 45MP full-frame sensor with IBIS, it produces portraits that are genuinely difficult to match. The DJI Action 5 Pro's magnetic mounting system makes it easy to move between hot shoe and chest harness positions during a session without losing recording continuity.
The Editing Problem — and How POV Syncer Solves It
Portrait sessions produce footage that's deceptively long. A 90-minute studio session with 200 stills means finding 200 specific moments in 90 minutes of action cam footage — even at 30 seconds per photo, that's 100 minutes of pure scrubbing. The irony is that the best portrait BTS videos use only 5 to 10 photographs. But to find those 5 to 10 best placements, you still have to scrub through all 200.
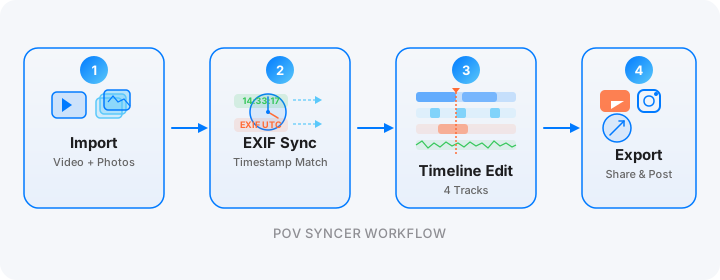
POV Syncer's EXIF matching eliminates the scrubbing entirely. Every photograph is placed automatically. You then simply select the 5 to 10 you want for the final video, remove the rest, and trim the surrounding footage. What took 100 minutes of scrubbing takes 5 minutes of selection.
Step-by-Step in the App
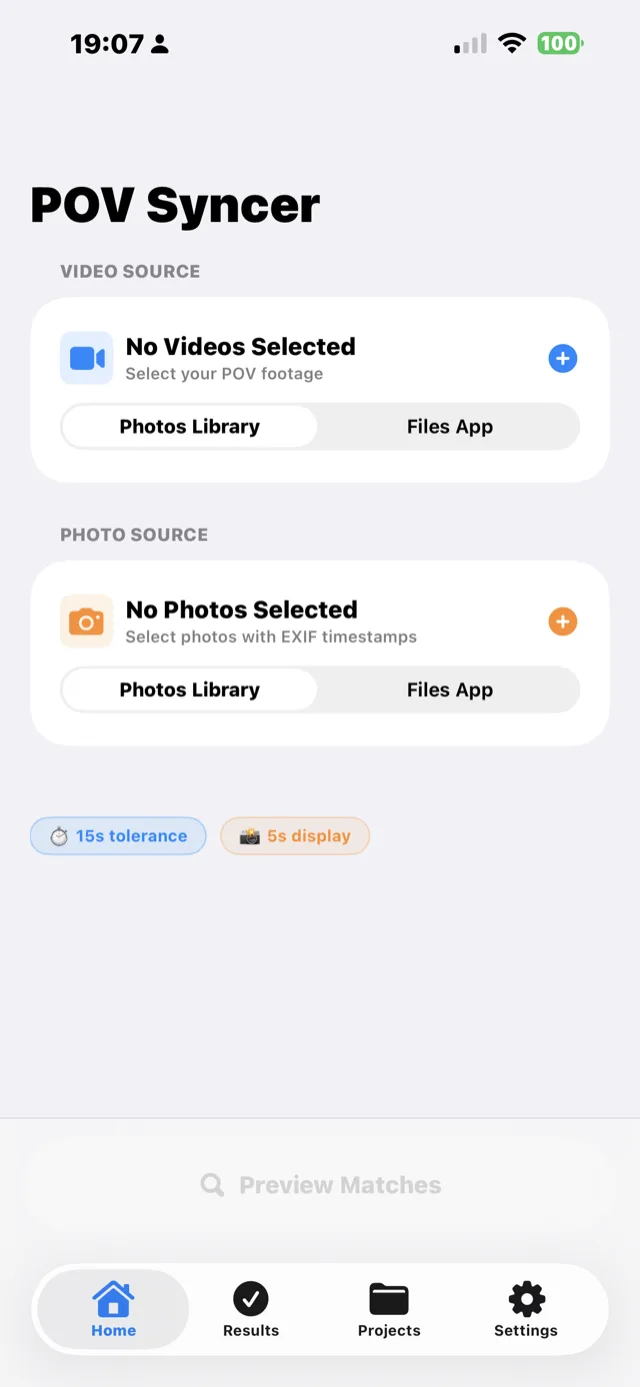


On the timeline, use the title track to label the lighting configuration: "1 key, 1 fill, 1 rim, 2:1 ratio". Add a brief AI narration — 15 seconds explaining your direction approach. Choose the voice that matches your audience. Export 9:16 for Reels and Shorts, 16:9 for YouTube.
Show your process — automatically
POV Syncer is free during beta. Import your BTS footage and portrait stills. Automatic EXIF matching places every photograph at the exact moment of capture — in seconds, not hours.
Download POV Syncer FreeWorks on iPhone, iPad, and Mac
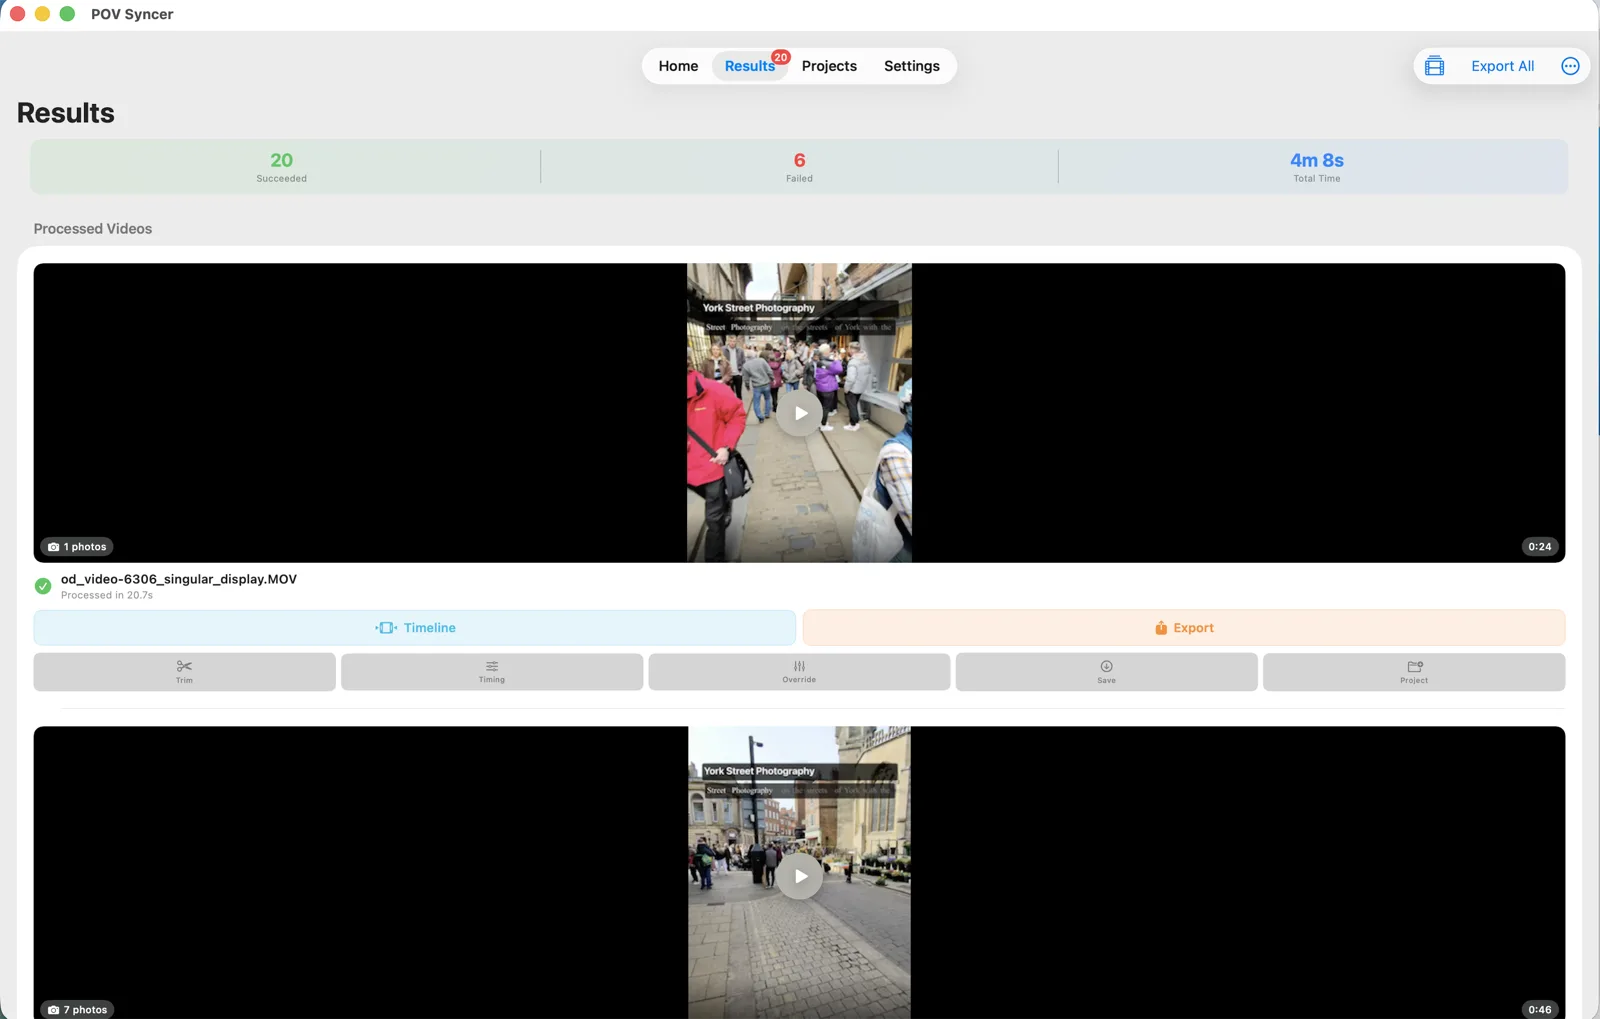
POV Syncer runs on iPhone, iPad, and Apple Silicon Mac. For studio photographers who edit at a desk after sessions, the Mac version gives you the most comfortable working environment — drag files from Finder, use the keyboard for precise timeline editing, and batch export all sessions with Export All to Photos.
Under the Hood: EXIF Matching in Studio Portrait Photography
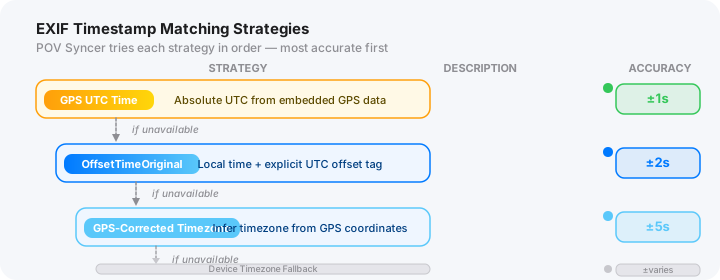
Studio portrait photography has a specific EXIF consideration: most portrait cameras don't have GPS enabled in studio settings (GPS drains battery and isn't needed for location-based work). This means the OffsetTimeOriginal strategy is the primary matching approach.
The critical preparation: set the UTC offset on your portrait camera before the session. On Sony: Menu → Setup → Time Zone. On Fujifilm: Menu → Set-Up → Date/Time. This ensures the EXIF DateTimeOriginal field includes the correct UTC offset for POV Syncer's second strategy to work accurately.
Additional controls available in POV Syncer:
- Adjustable tolerance — portrait sessions with multiple stills per burst benefit from ±2 to ±5 second tolerance to capture the best frame from a burst rather than only the first.
- Per-video timing offset — if your action cam clock is systematically ahead of your portrait camera, apply a blanket offset to all clips.
- 100-photo cap — for portrait sessions with 300+ stills from multiple clients in one day, the cap ensures sensible distribution across the footage.
Six Tips for Portrait Photography BTS Videos
1. Get Subject Consent Before Recording
Always get explicit consent from your portrait subjects before recording BTS video. This is non-negotiable for professional and commercial work, and it avoids the awkwardness of asking after the session. Most clients are happy to be featured — especially if you explain that the BTS video showcases your process rather than primarily featuring them. Having consent in writing is good practice.
2. Record the Lighting Setup Before the Subject Arrives
A 2-minute walkthrough of your studio configuration before the client arrives is valuable content in itself — and it captures the technical setup that contextualises the eventual portrait. Pan the action cam across the softboxes, the reflectors, the background. Describe the configuration briefly. This sequence adds professional credibility to the final BTS video.
3. Show the Adjustments, Not Just the Successes
The most engaging portrait BTS content shows the photographer adjusting — changing the light position, asking for a different expression, moving the camera position. These moments of professional problem-solving are what prospective clients and other photographers find most instructive. Don't cut around them.
4. Use the Title Track for Lighting Specs
Use POV Syncer's title track to overlay the technical details — "Key: 85cm Octobox f/8 | Fill: V-flat 2:1 | Rim: Grid spot f/11 | 85mm f/1.4". This overlay appears over the studio footage, giving photographer viewers the information they want without requiring a narration that talks over the footage.
5. Let the Portrait Hold for 3 to 4 Seconds
When the portrait appears in the video, give it 3 to 4 seconds of hold time before returning to footage. This is the payoff moment — the image the viewer has been building anticipation for. A quick flash doesn't do it justice. 3 seconds is enough for a viewer to take in a portrait without the video feeling static.
6. Create a Session-Summary Version for Clients
Beyond social media content, consider creating a private BTS video for each client — a 2-minute summary of their session with 8 to 10 of the best photographs placed at their exact moments. Share it via a private link. Clients find this genuinely touching — it shows the care and craft that goes into producing their portraits. It's also a powerful referral tool.