POV Syncer for Mac: The Complete Tutorial
Everything POV Syncer does on an Apple Silicon Mac, screen by screen — from loading a whole shoot to exporting finished POV videos. The bigger screen and a real mouse and keyboard make the Mac the fastest way to batch-edit hundreds of clips at once.
What you'll need
- An Apple Silicon Mac — M1, M2, M3 or M4 (Intel Macs can't run iOS apps)
- macOS 14 (Sonoma) or later
- Your POV camera footage (Ray-Ban Meta, GoPro, Insta360 …) and the photos you shot in the same session, both in your Photos library or a folder
POV Syncer matches each photo to the exact moment in your video where it was taken — using the photo's EXIF timestamp — then drops it on screen with a shutter click, optional captions and AI narration. On the Mac you get the identical app running in Designed for iPad mode, but with a large resizable window, trackpad and full keyboard. That makes it ideal for working through a big shoot quickly.
1. Install POV Syncer on your Mac
POV Syncer doesn't ship a separate Mac build — Apple Silicon Macs run the same app you'd install on iPhone, in a resizable window. To get it:
- Open the App Store on your Mac and search POV Syncer.
- On the results page, switch the tab from Mac Apps to iPhone & iPad Apps — POV Syncer appears with a "Designed for iPad" badge.
- Click Get, authenticate with Touch ID, and launch from Launchpad or
/Applications.
The first time you tap Add Video or Add Photos, macOS asks for Photos access — choose Allow Full Access for the fastest picker on large libraries. If you record your own voiceover, macOS will also prompt for the microphone.
2. Load your photos and videos
The Home tab has two cards: a Video Source and a Photo Source. For each, choose Photos Library to pick from your photo library, or Files App to pull footage from a folder, USB-C SSD or memory card. Add every video and photo from the session — POV Syncer reads only the metadata up front, so loading hundreds of items stays fast.
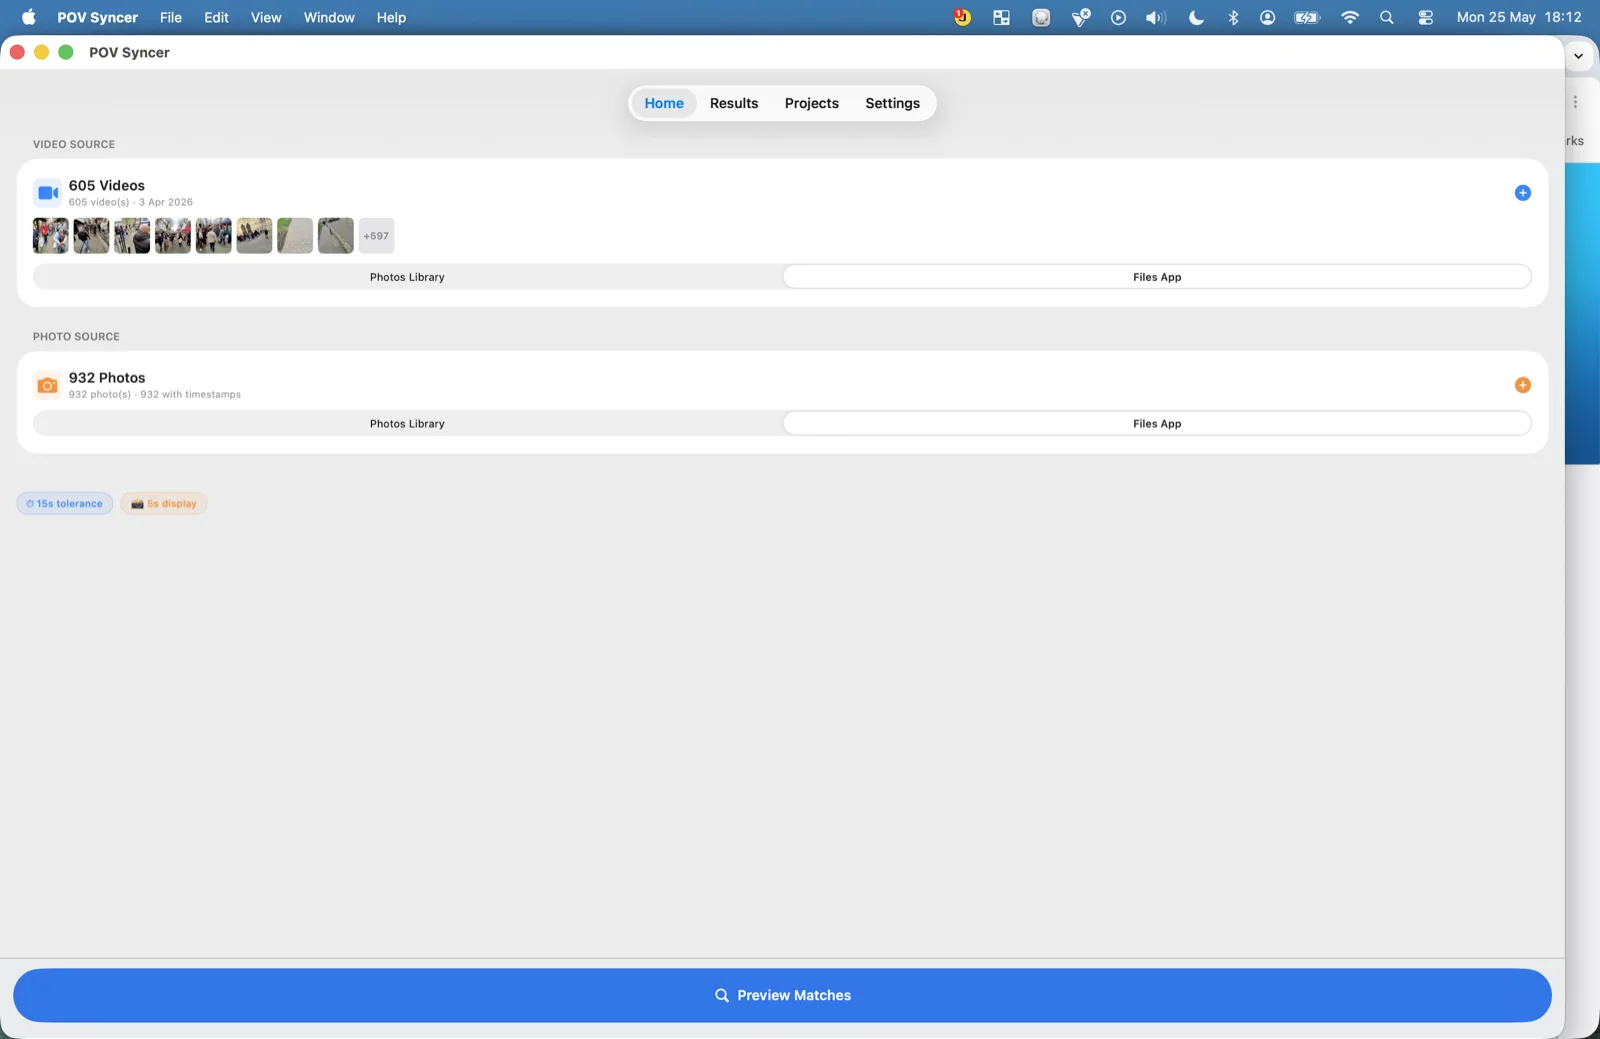
The photo card tells you how many photos carry a usable timestamp (here, 932 of 932). The pills below show your current tolerance (how far apart a photo and a video moment can be and still match) and whether the EXIF label will be shown. When you're ready, click Preview Matches.
3. Preview the matches
The Match Preview screen shows, before you commit to a render, exactly which videos got photos. The summary across the top counts your Videos, how many were Matched, how many were Skipped (no photo fell inside the tolerance window), and how many you're about to Process.
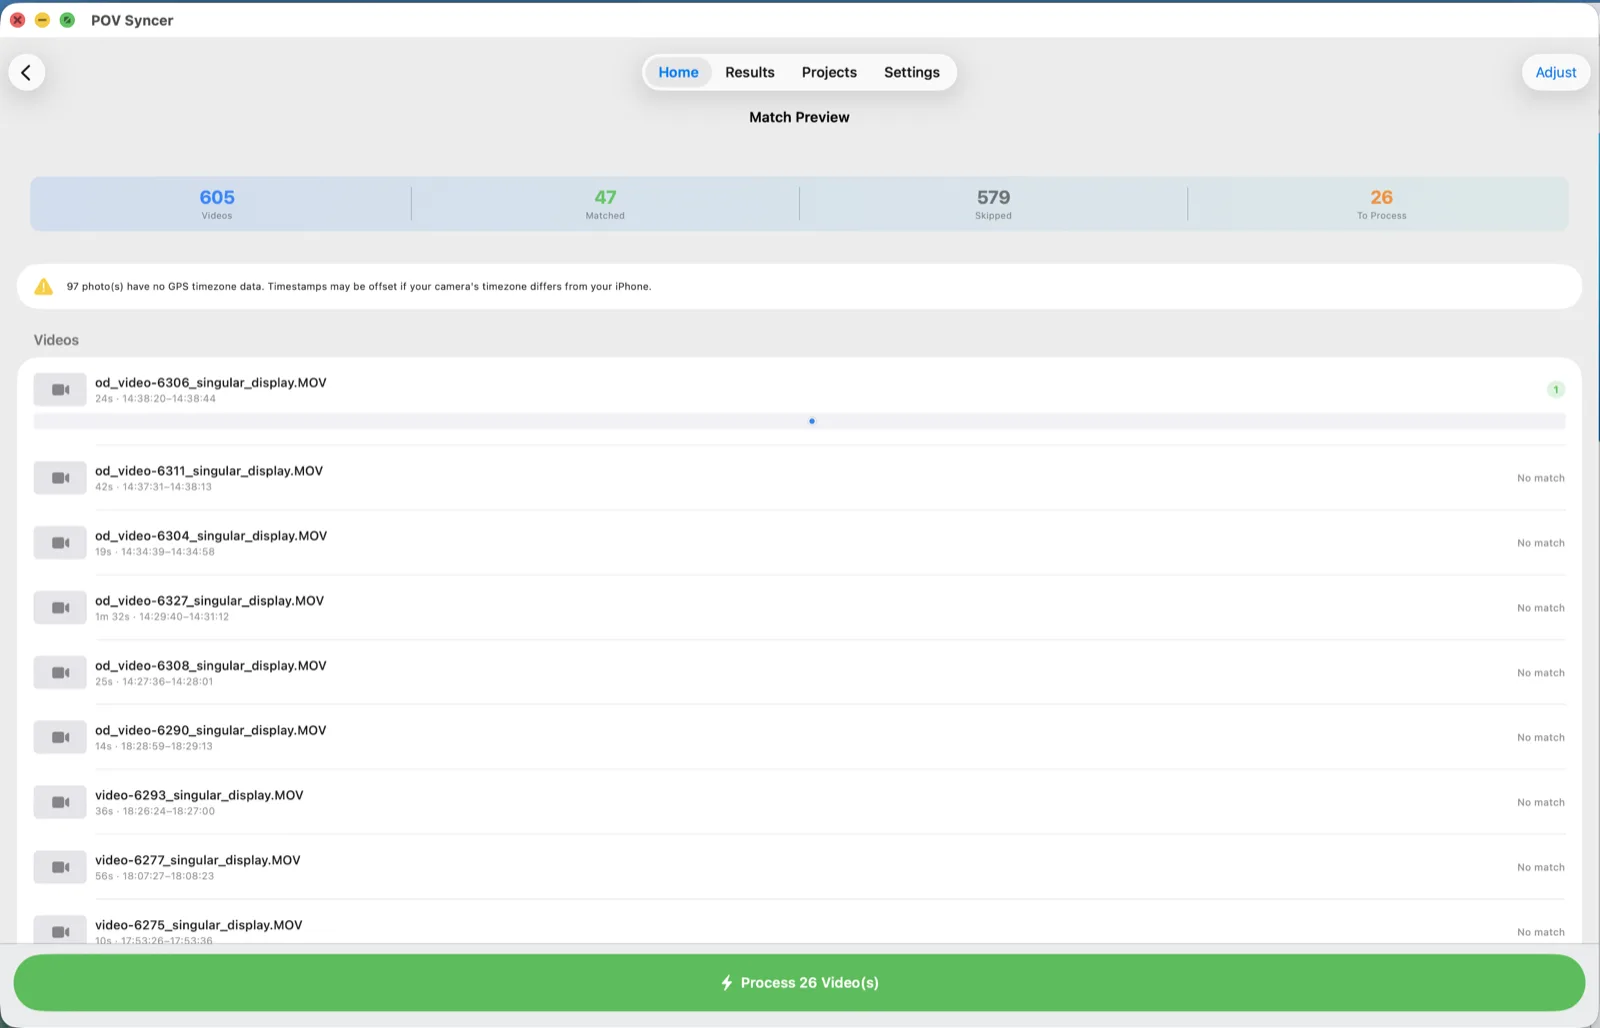
If you see a note about photos with no GPS timezone data, that just means those timestamps could drift if your camera's clock differs from your phone's — widen the tolerance or use Adjust Timing later. Click Process N Video(s) at the bottom to start.
4. Process (render) the videos
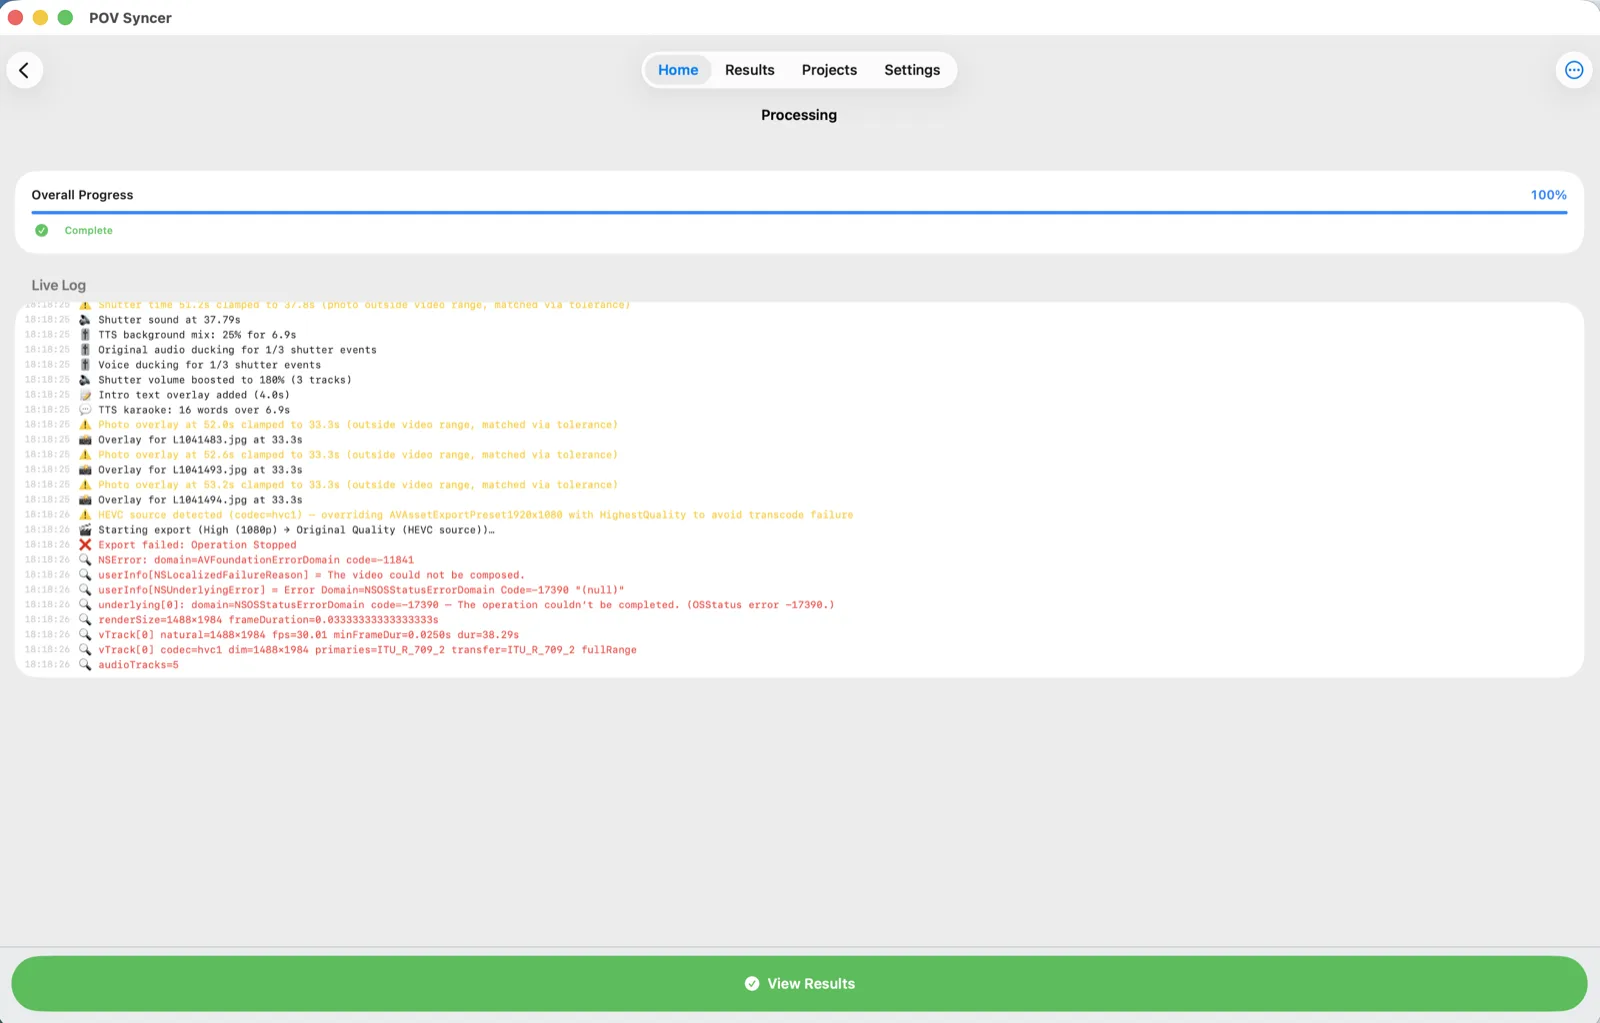
Processing renders each matched video in turn. The Overall Progress bar tracks the batch, the Current Video card shows the clip being worked on, and the Live Log streams every step — tolerance, audio offset, matched photo counts, shutter sounds, overlays and the final export.
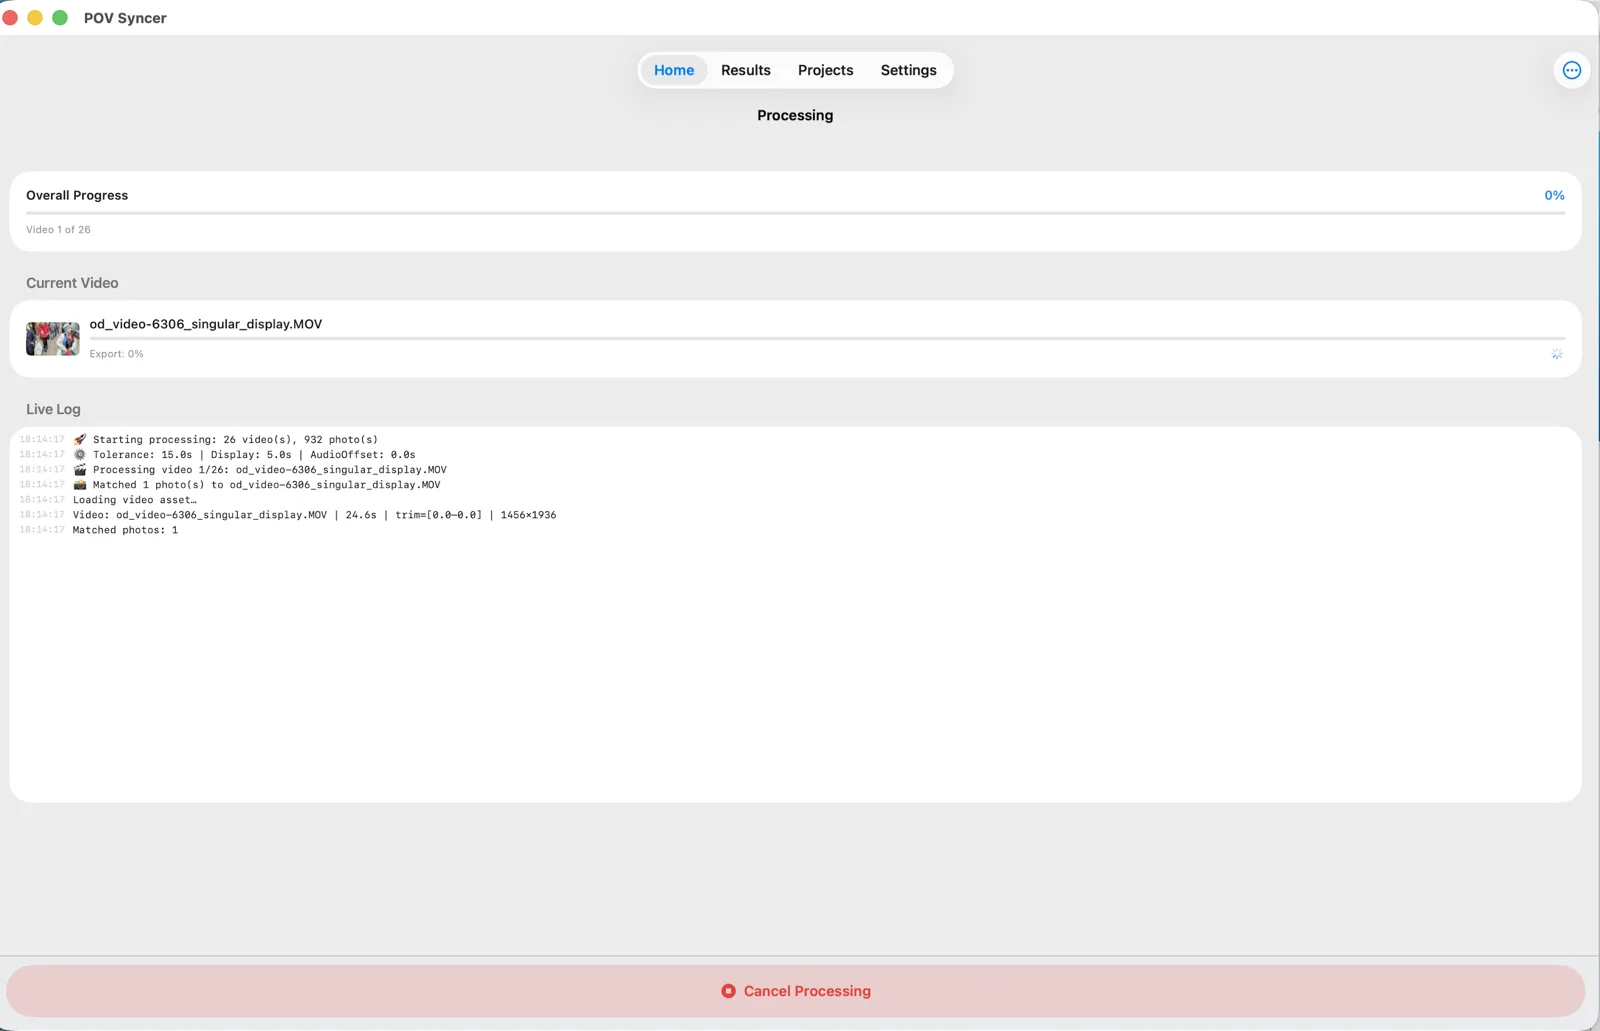
Because this is a Mac app, you can switch to Mail or Safari mid-render and come back without the job being killed — something iOS can't always guarantee. When the bar reaches 100% you'll see Complete and a View Results button. Any clip that failed to export is flagged in red in the log.
5. Review the results
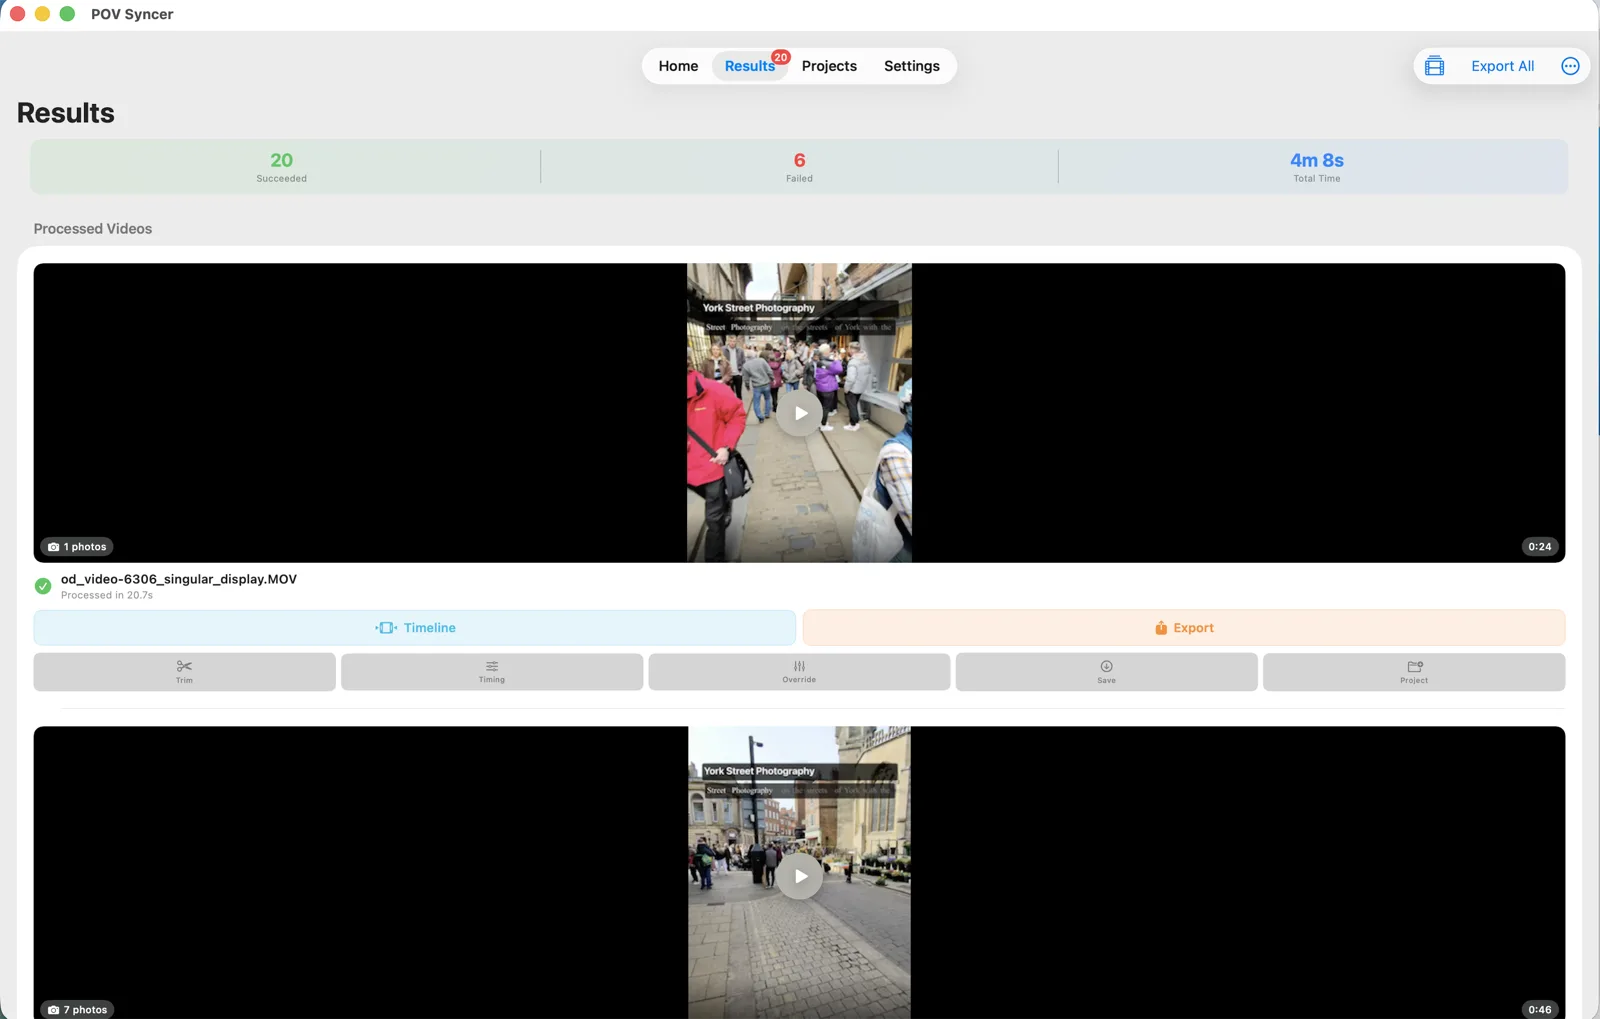
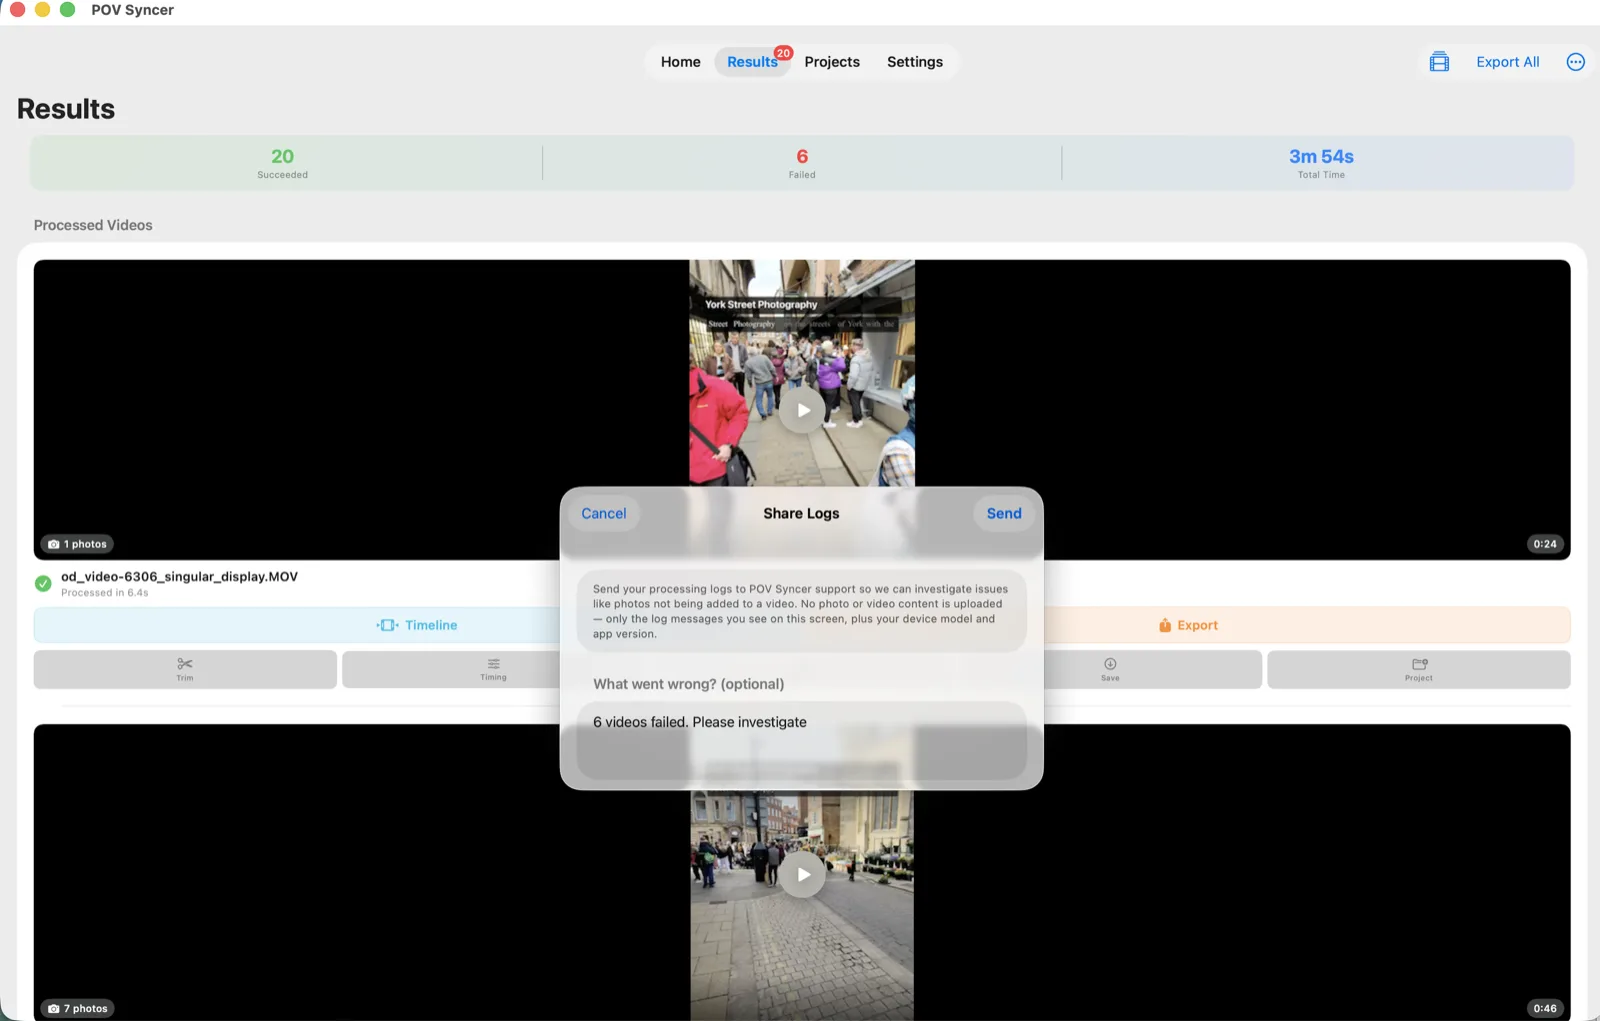
The Results tab lists every processed video with an inline player, a photo-count badge and the clip length. The summary shows how many Succeeded, how many Failed, and the total render time. Each video has its own row of actions: Timeline, Export, Trim, Timing, Override, Save and Project.
6. Preview a finished video
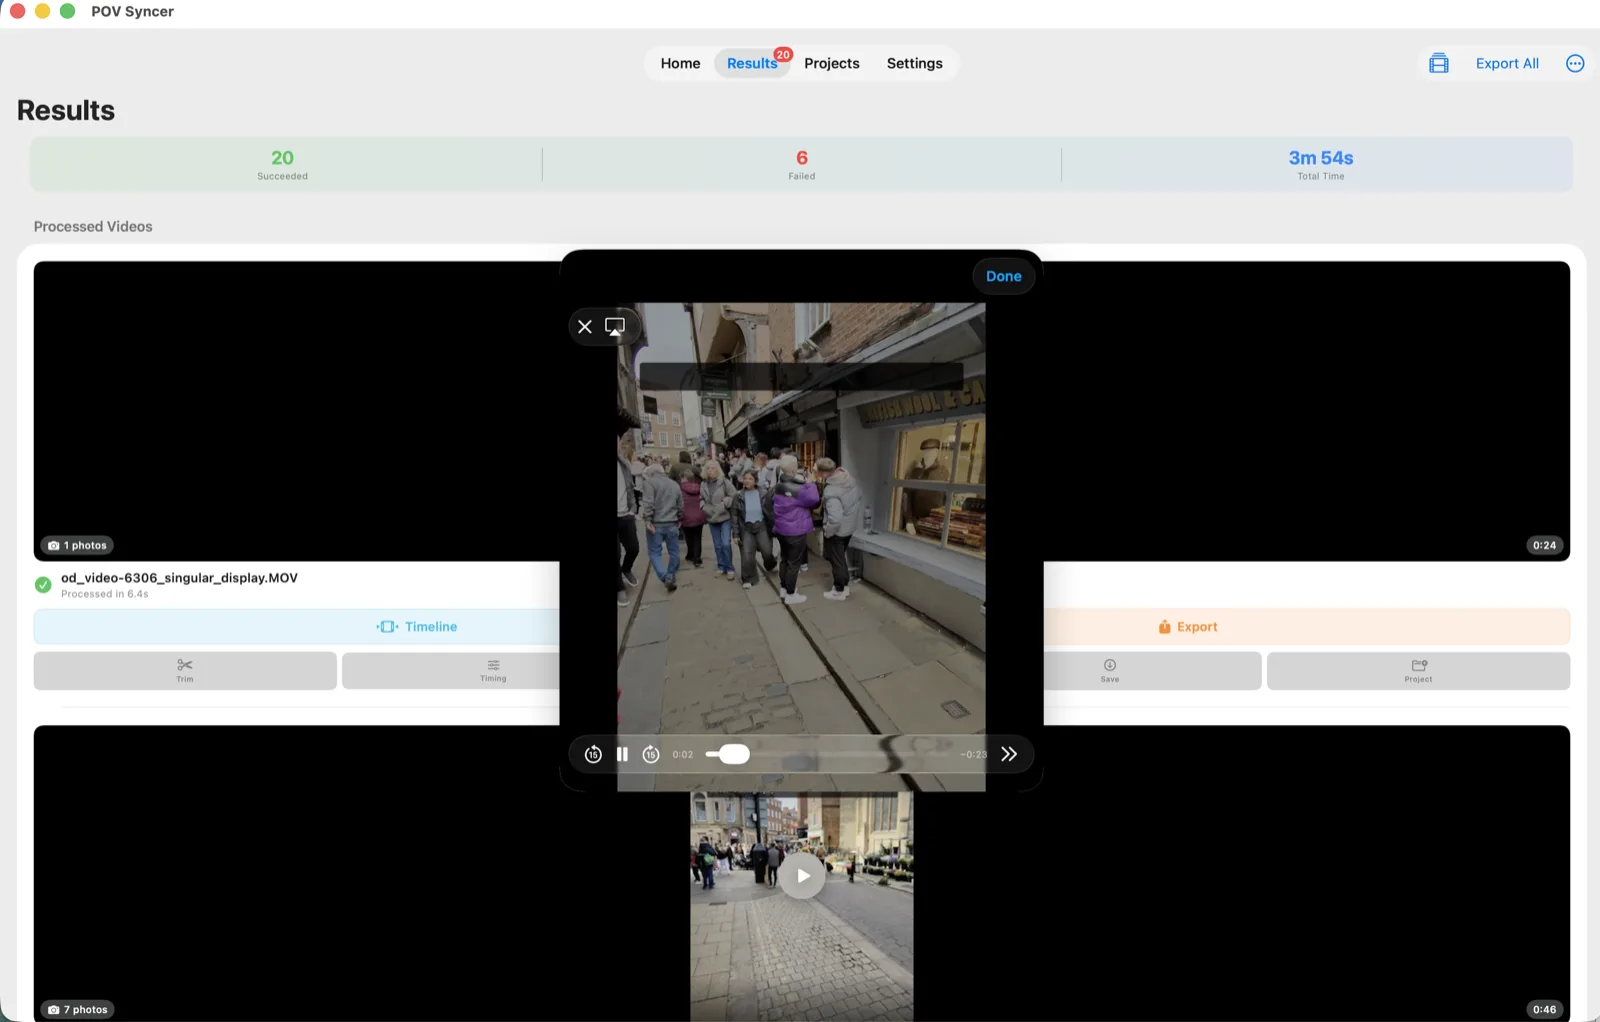
Click any video's thumbnail to open it in a full player without leaving the Results screen. Use the transport controls to scrub through and check the photo timing, shutter sounds and any overlay before you export. Click Done to close.
7. Trim a video
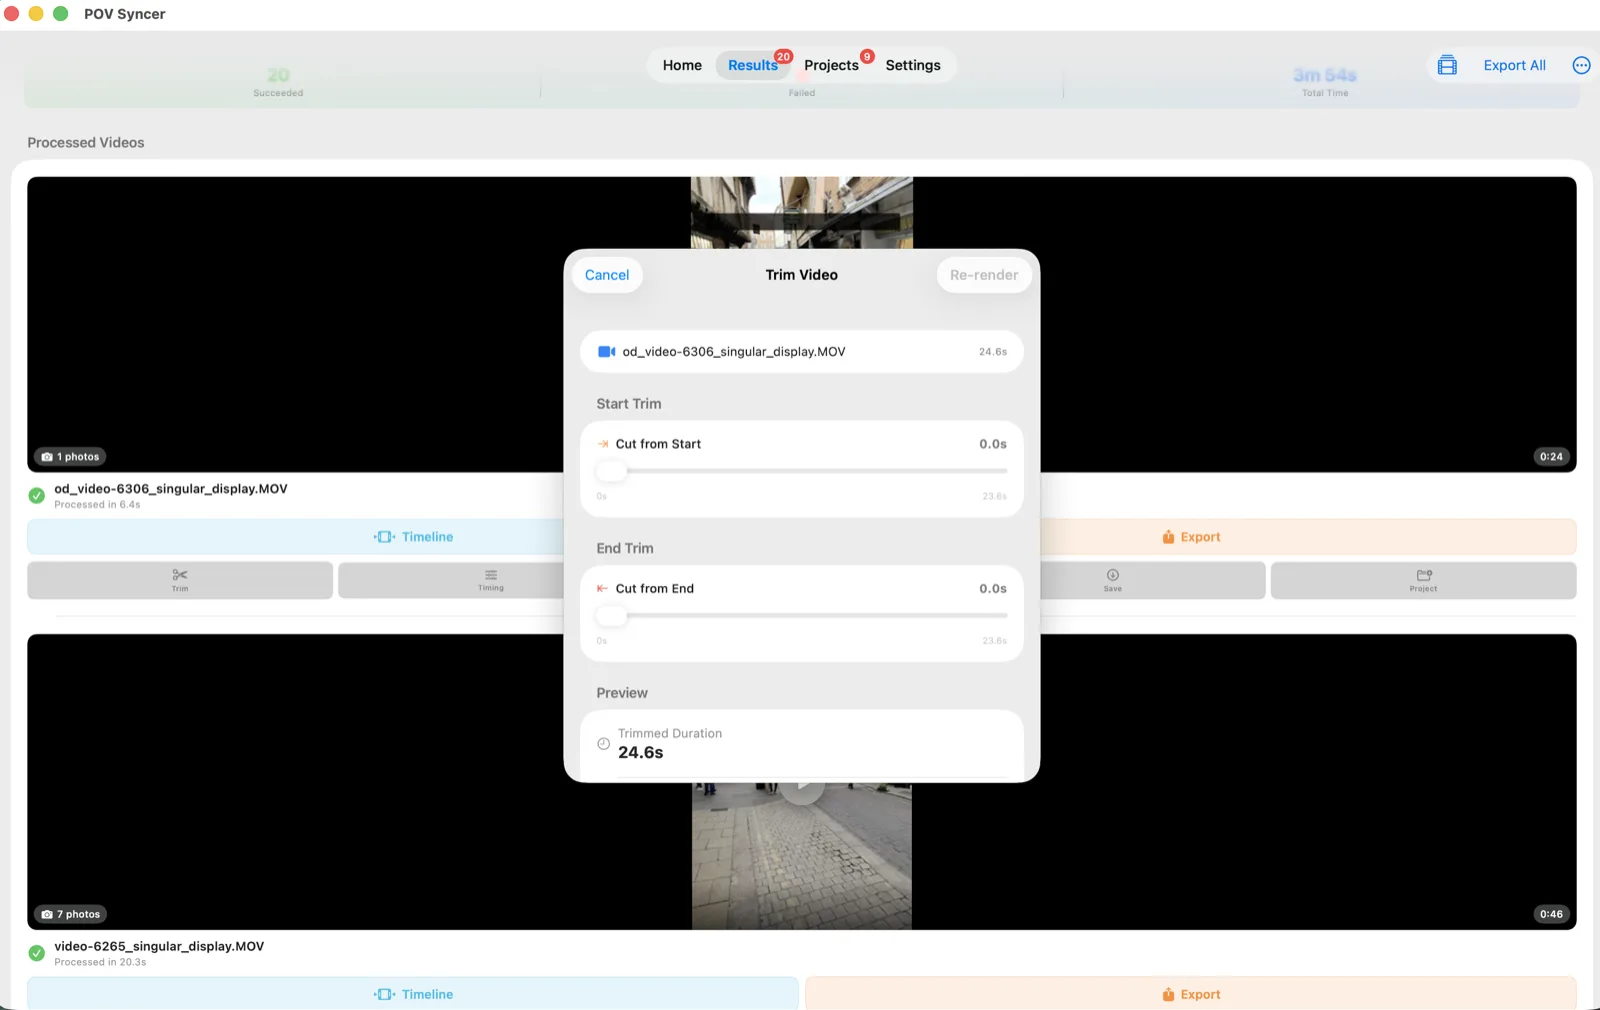
Click Trim on a video to cut dead time off the start or end. Drag Cut from Start and Cut from End; the Trimmed Duration updates live. Click Re-render to produce the shortened clip.
8. Adjust shutter & photo timing
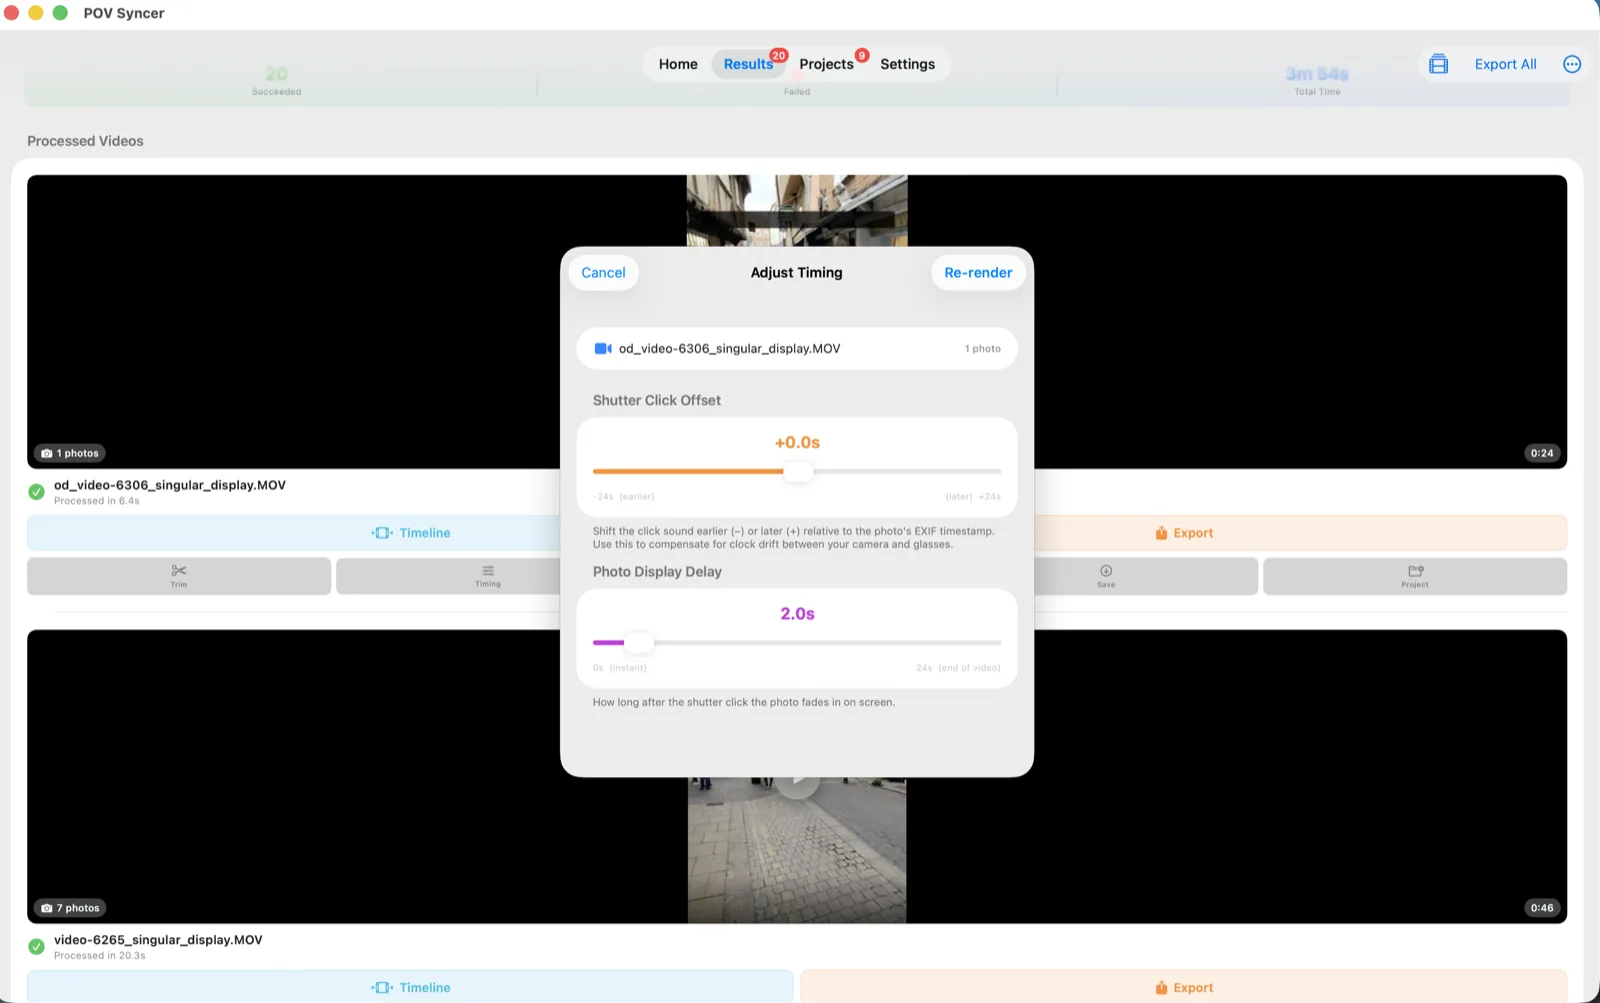
If a photo appears slightly before or after the moment you actually pressed the shutter — usually because the camera clock drifts from your phone — click Timing. Shutter Click Offset shifts the click sound earlier (−) or later (+) relative to the photo's EXIF timestamp. Photo Display Delay sets how long after the click the photo fades in. Re-render to apply.
9. Per-video overrides
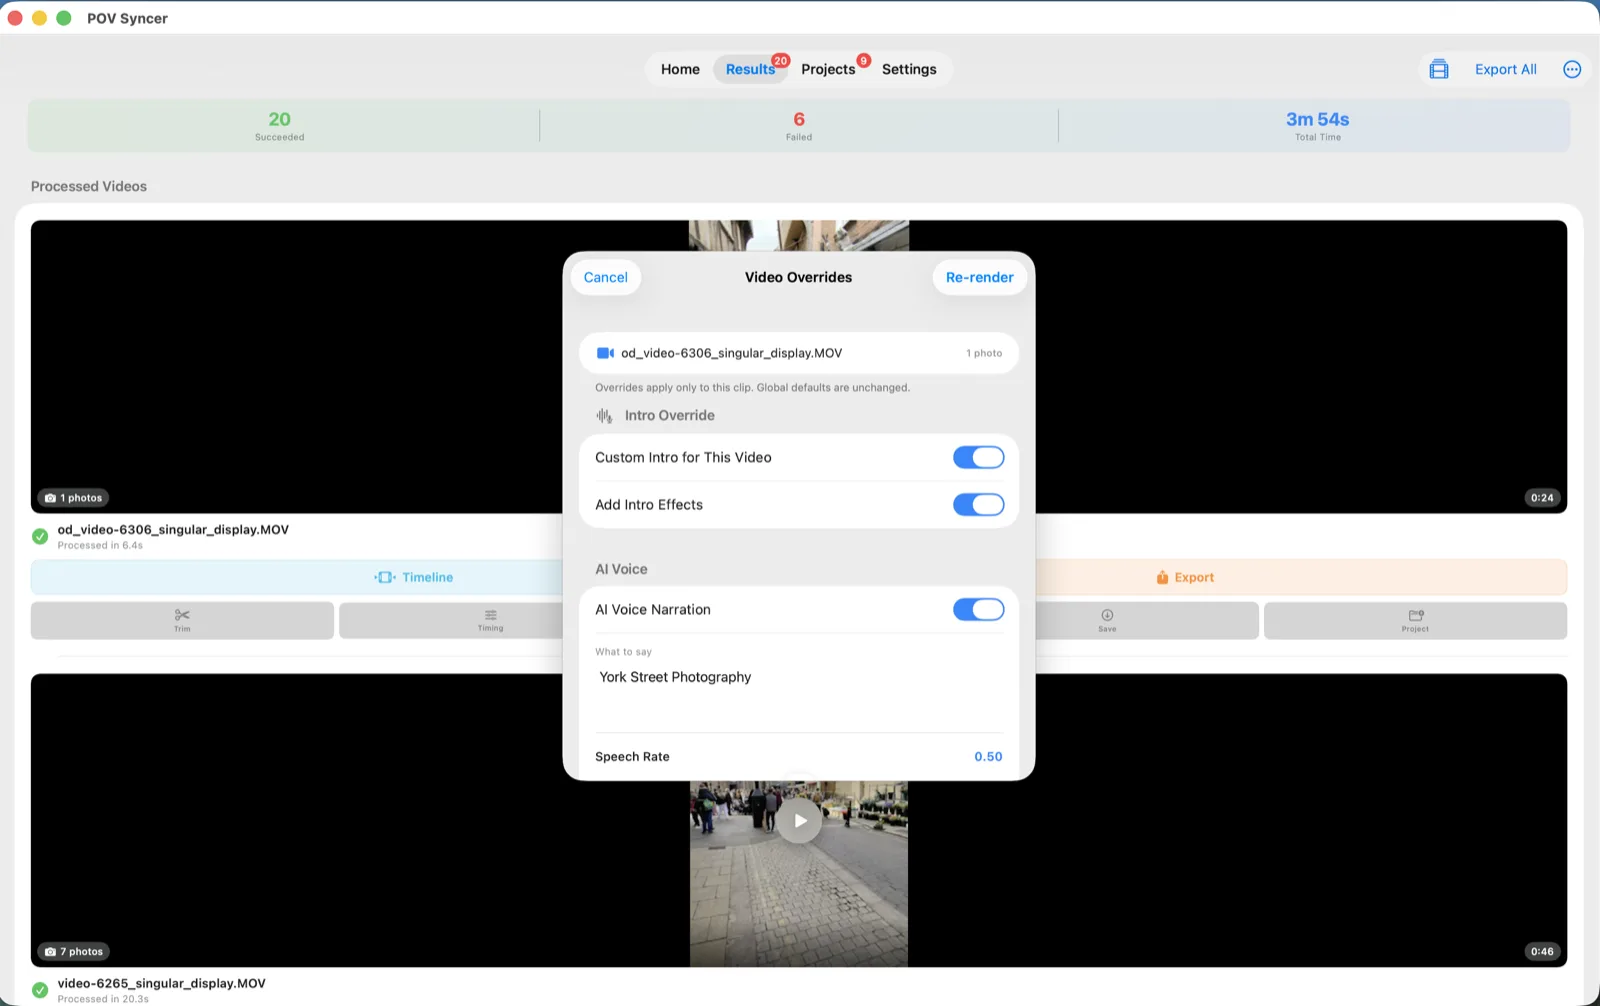
Click Override to change settings for this clip only — your global defaults stay untouched. You can give one video a custom intro, toggle intro effects, or turn on AI voice narration with its own script and speech rate. Perfect for adding a unique opening line to a single highlight.
10. Edit on the timeline
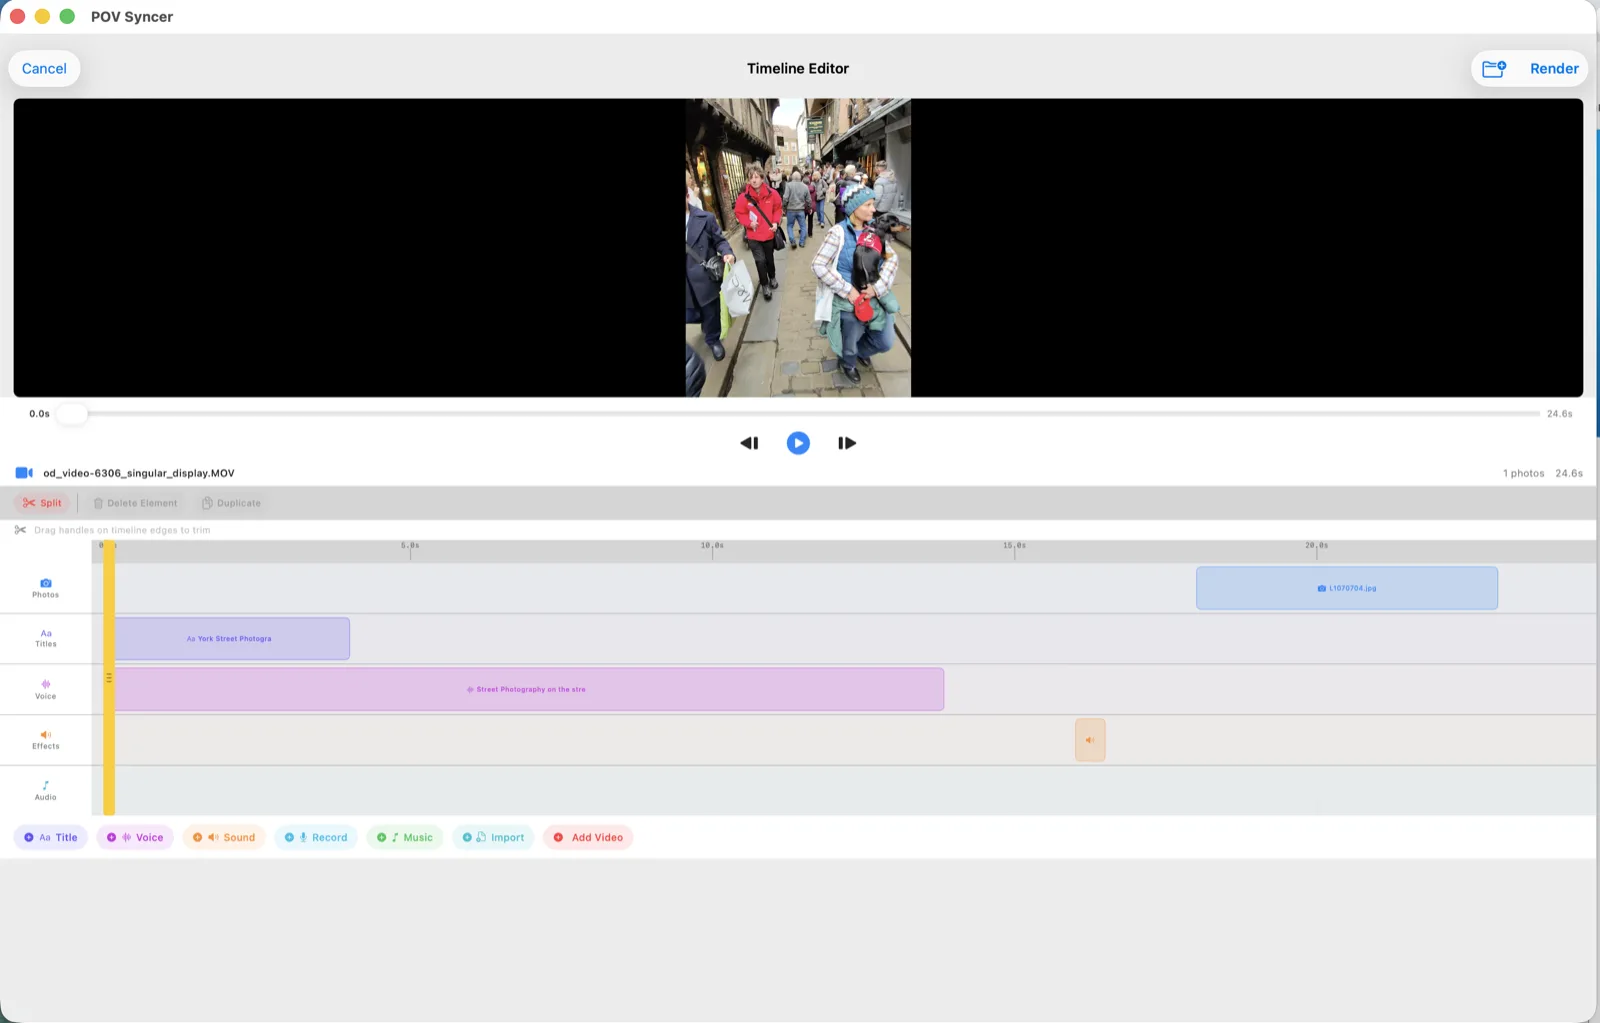
For full control, click Timeline to open the Timeline Editor. A preview sits at the top with transport controls; below it are five tracks — Photos, Titles, Voice, Effects and Audio. Drag elements to reposition them, drag their edges to trim, and use Split, Delete Element and Duplicate. The add bar at the bottom lets you drop in a Title, Voice, Sound, Record, Music, Import or another Video. Click Render when you're happy.
11. Add a title overlay
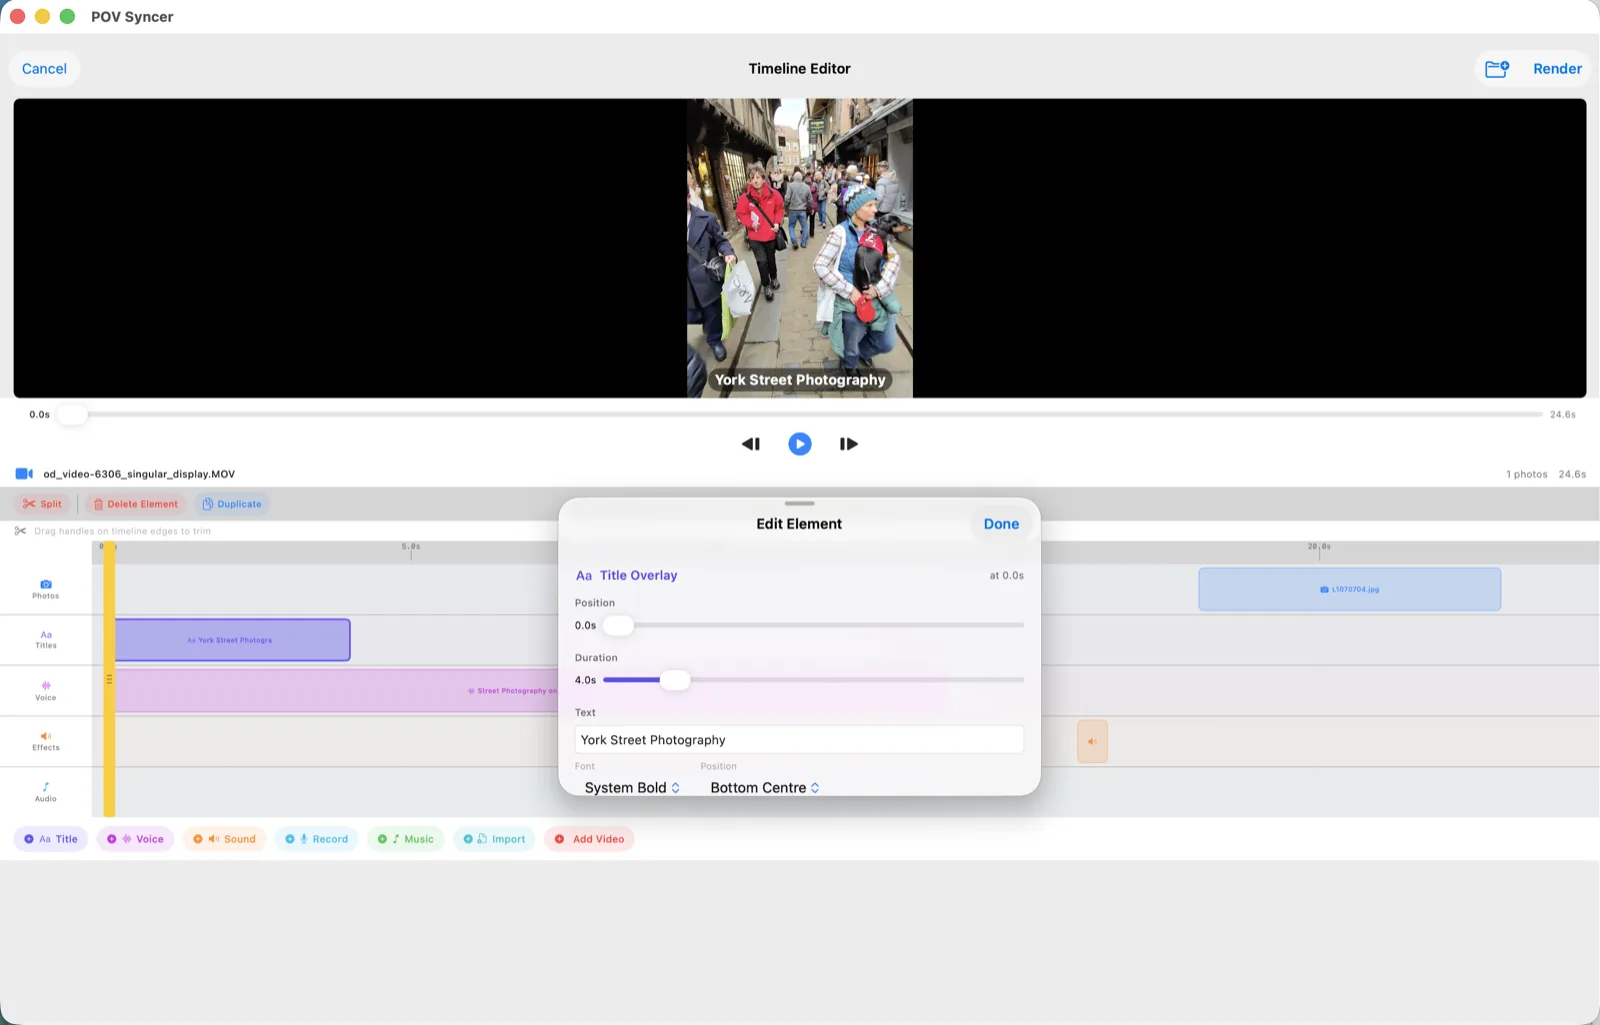
Click Aa Title in the add bar, then click the new element to edit it. Set the Position (where on the timeline it starts), the Duration, the Text, the Font and the on-screen Position (e.g. Bottom Centre). The preview updates as you type. Click Done.
12. Add AI voice narration
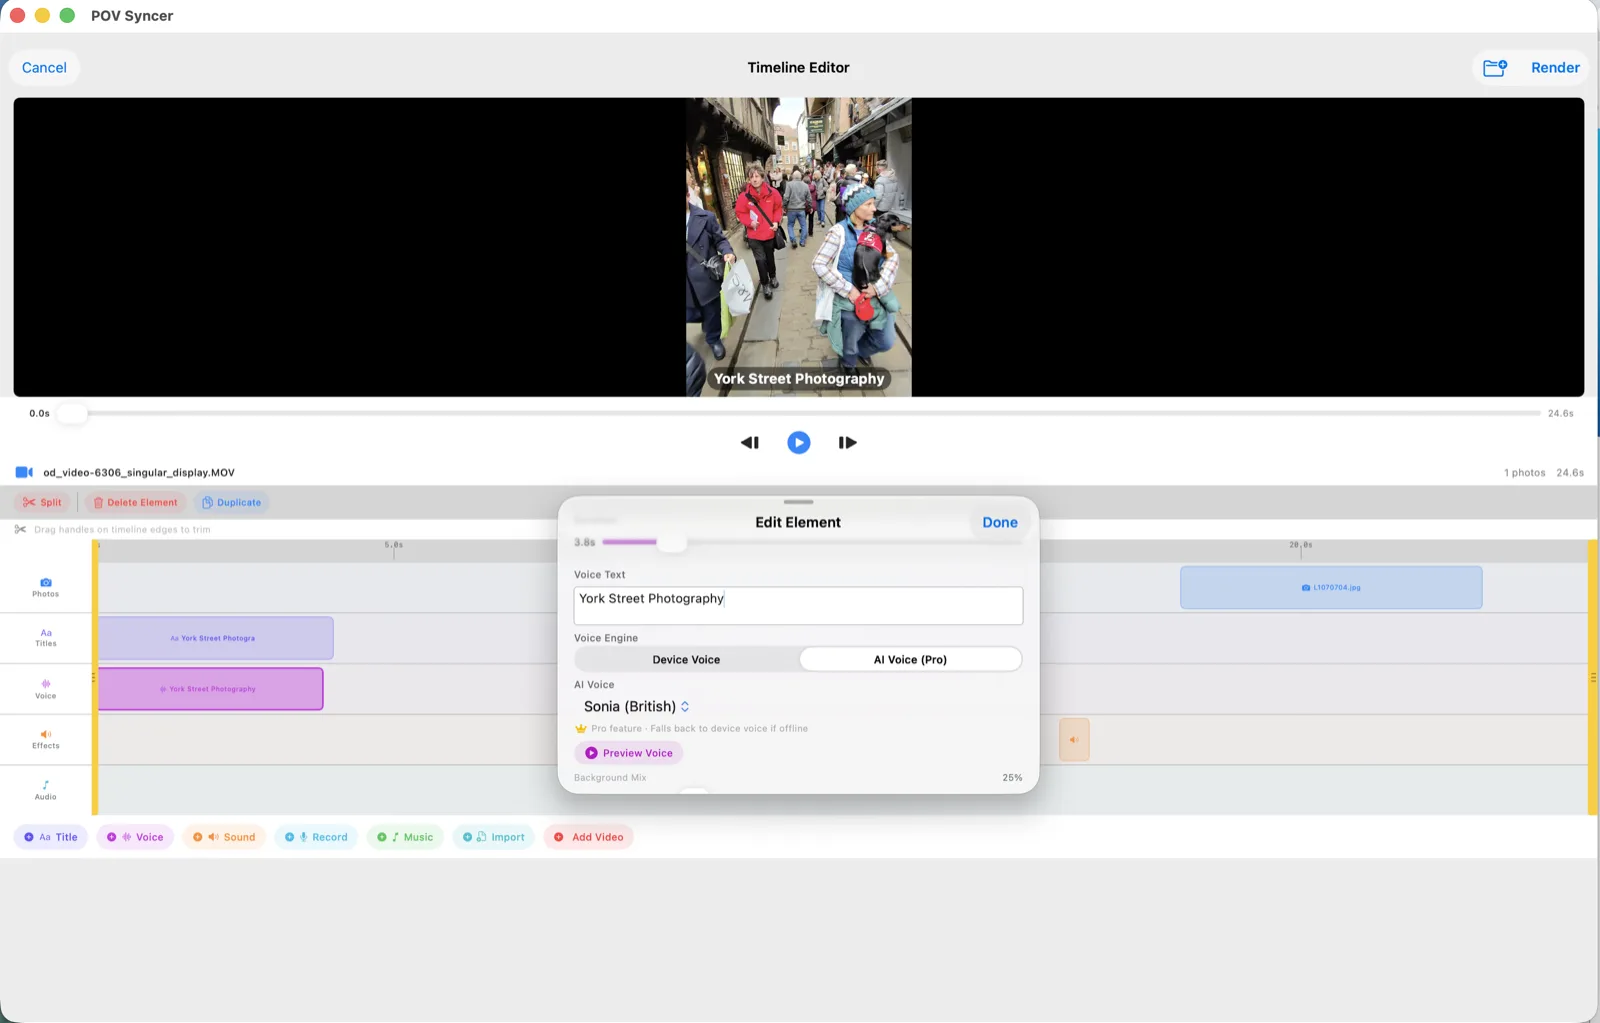
Click Voice in the add bar to add narration to the timeline. Type what you want said in Voice Text, then pick a Voice Engine: Device Voice works offline, while AI Voice (Pro) uses high-quality neural voices such as Sonia (British). Tap Preview Voice to hear it and adjust the Background Mix so the original audio sits under the narration. Click Done.
13. Export & share one video
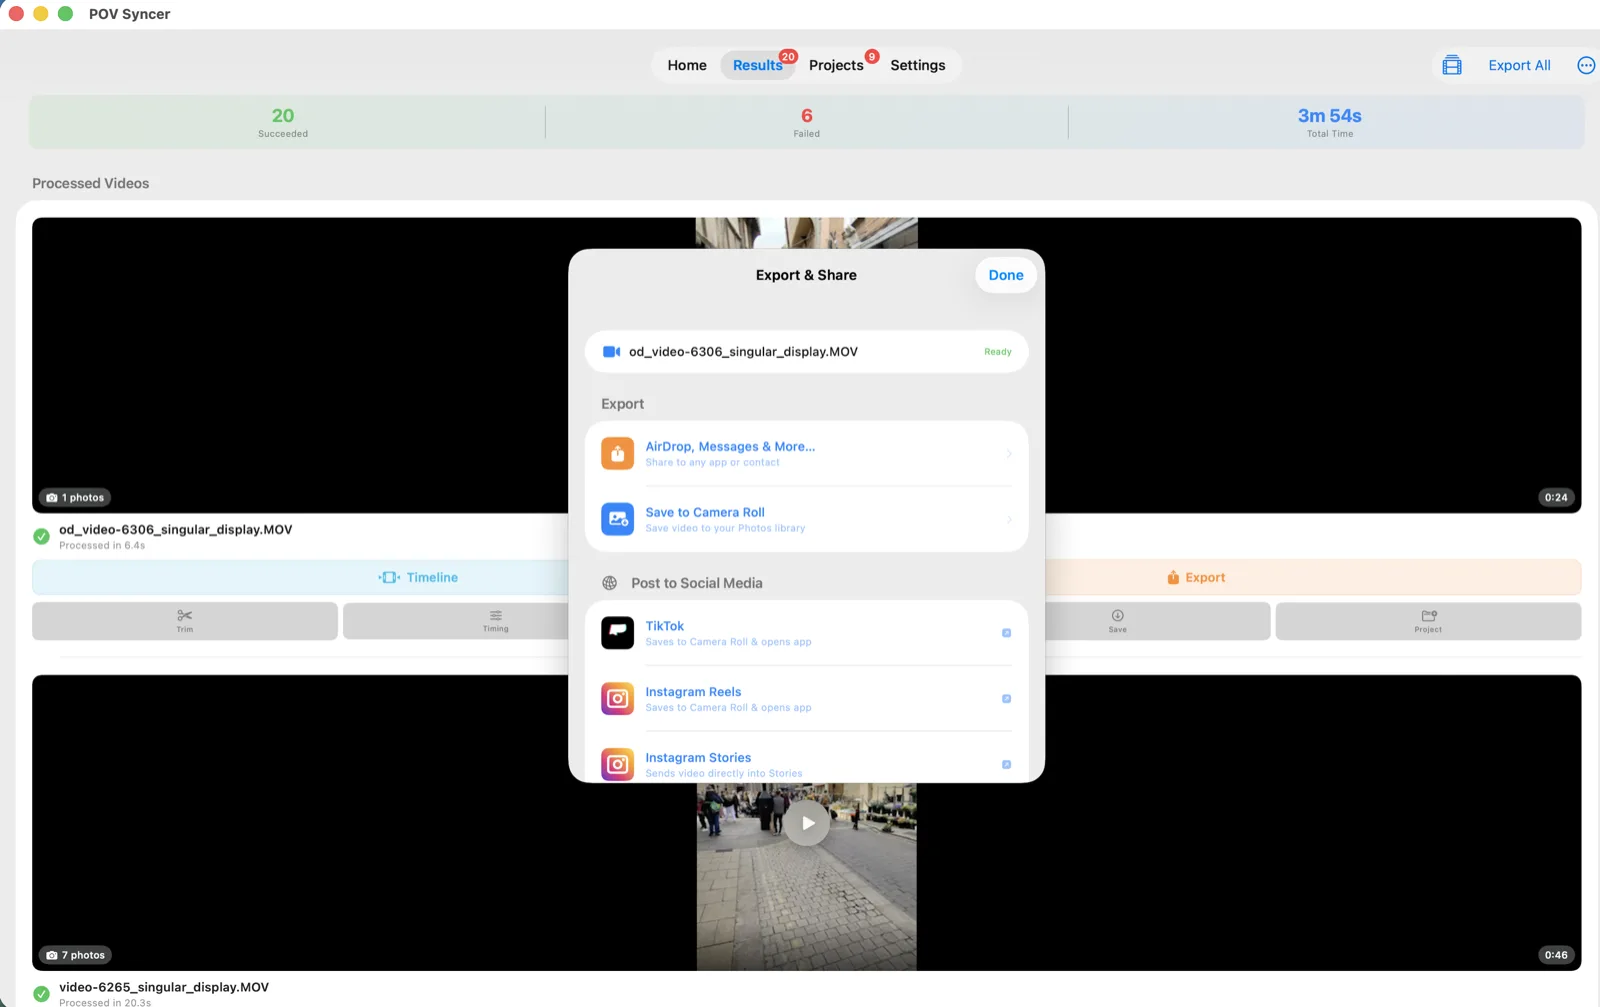
Click Export on any finished video to open Export & Share. Use AirDrop, Messages & More… to send it anywhere, Save to Camera Roll to add it to Photos, or post straight to TikTok, Instagram Reels or Instagram Stories.
14. Export all videos to Photos
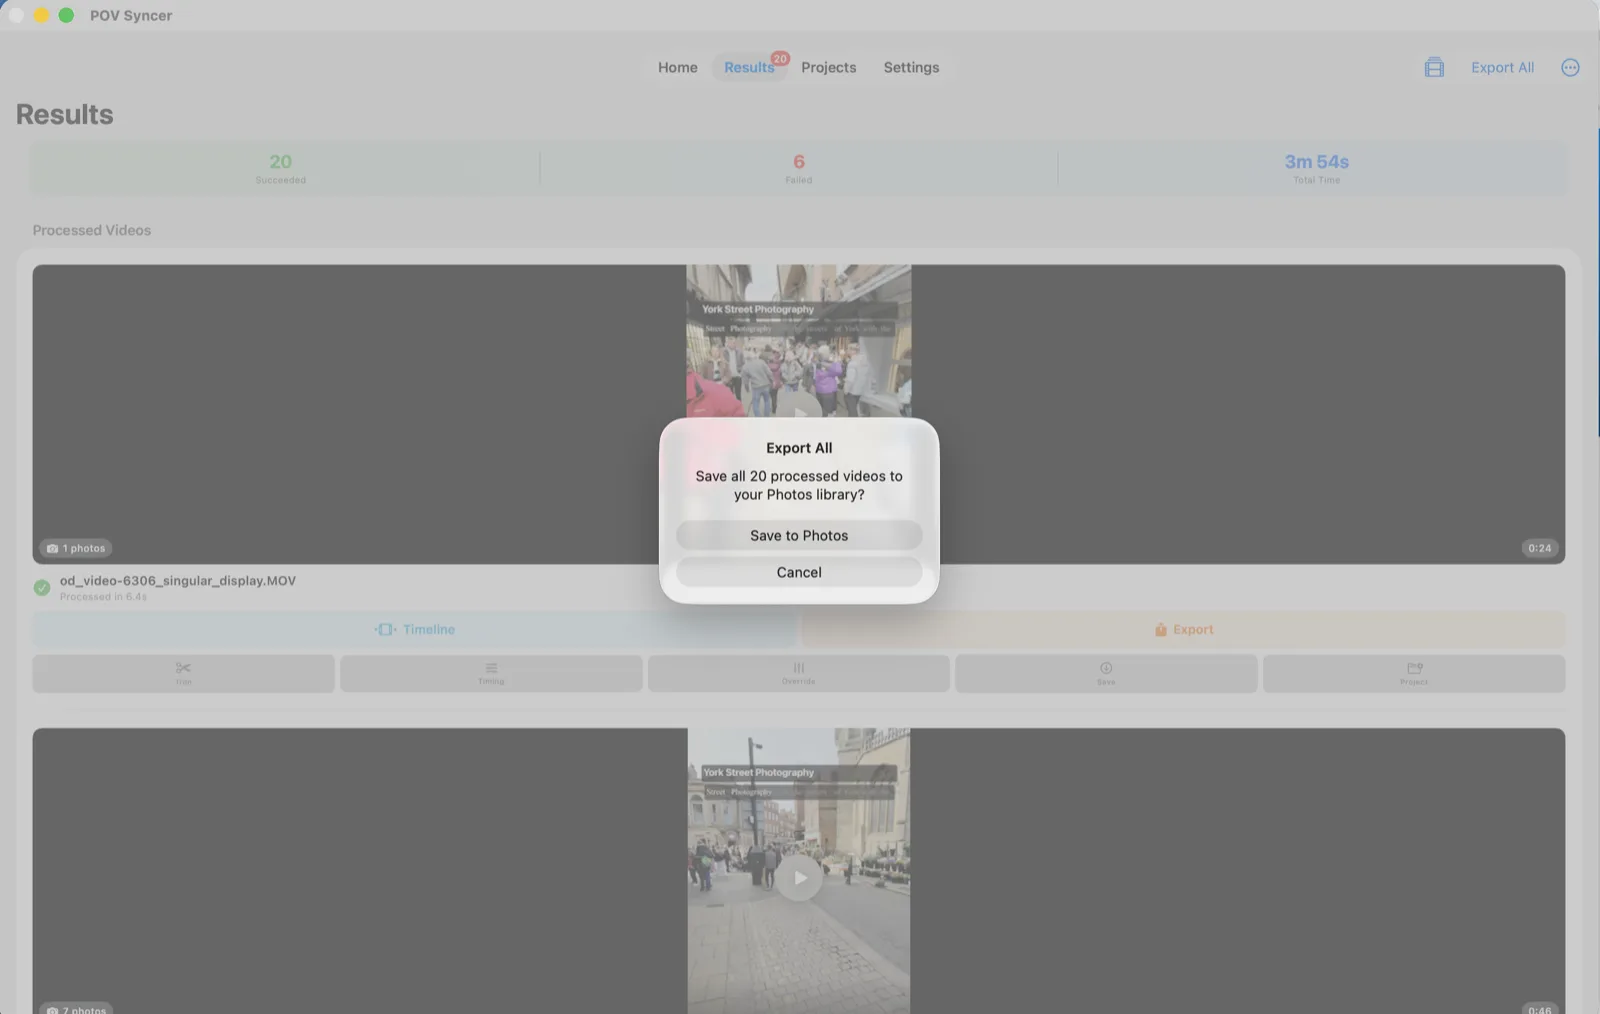
To save the entire batch at once, click Export All at the top of the Results screen and confirm Save to Photos. Every successfully processed video is written to your Photos library in one step — by far the quickest way to finish a big shoot.
15. Save a project
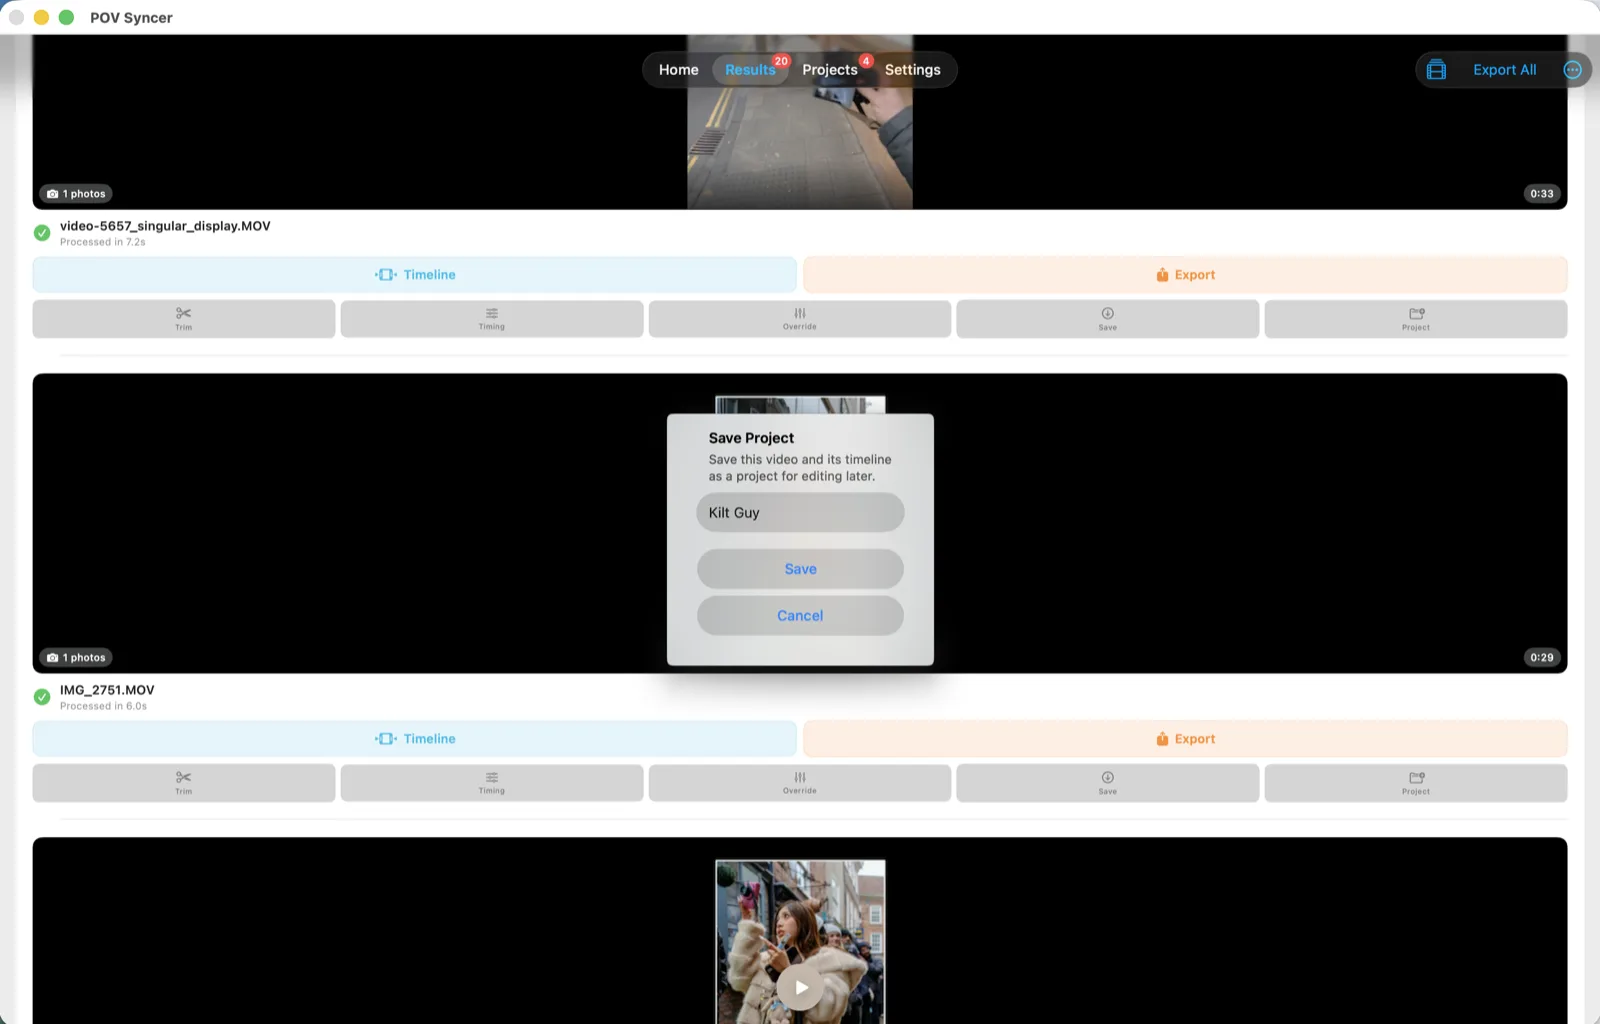
Want to come back and tweak a video later? Click Save on its row, give the project a name, and click Save. POV Syncer stores the video and its full timeline so you can reopen and re-edit it without reprocessing from scratch.
16. Open a saved project
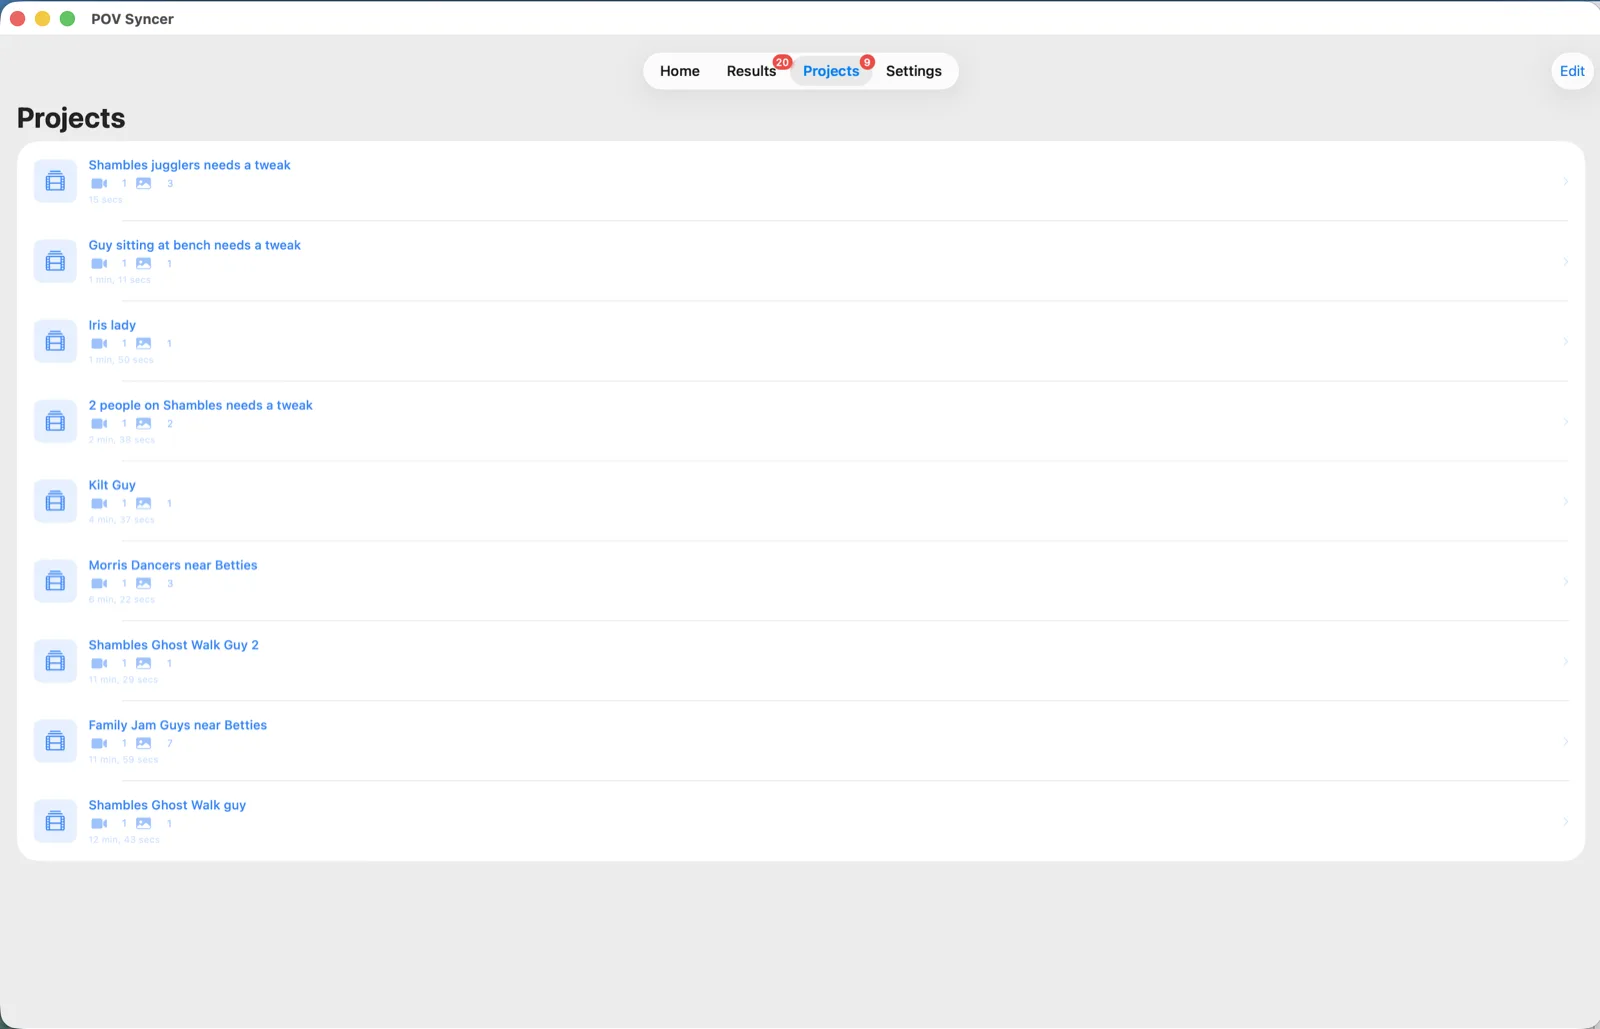
The Projects tab lists everything you've saved, with each project's video and photo counts and its duration. Click a project to reopen it in the timeline editor; use Edit (top right) to remove ones you no longer need.
17. Settings deep dive
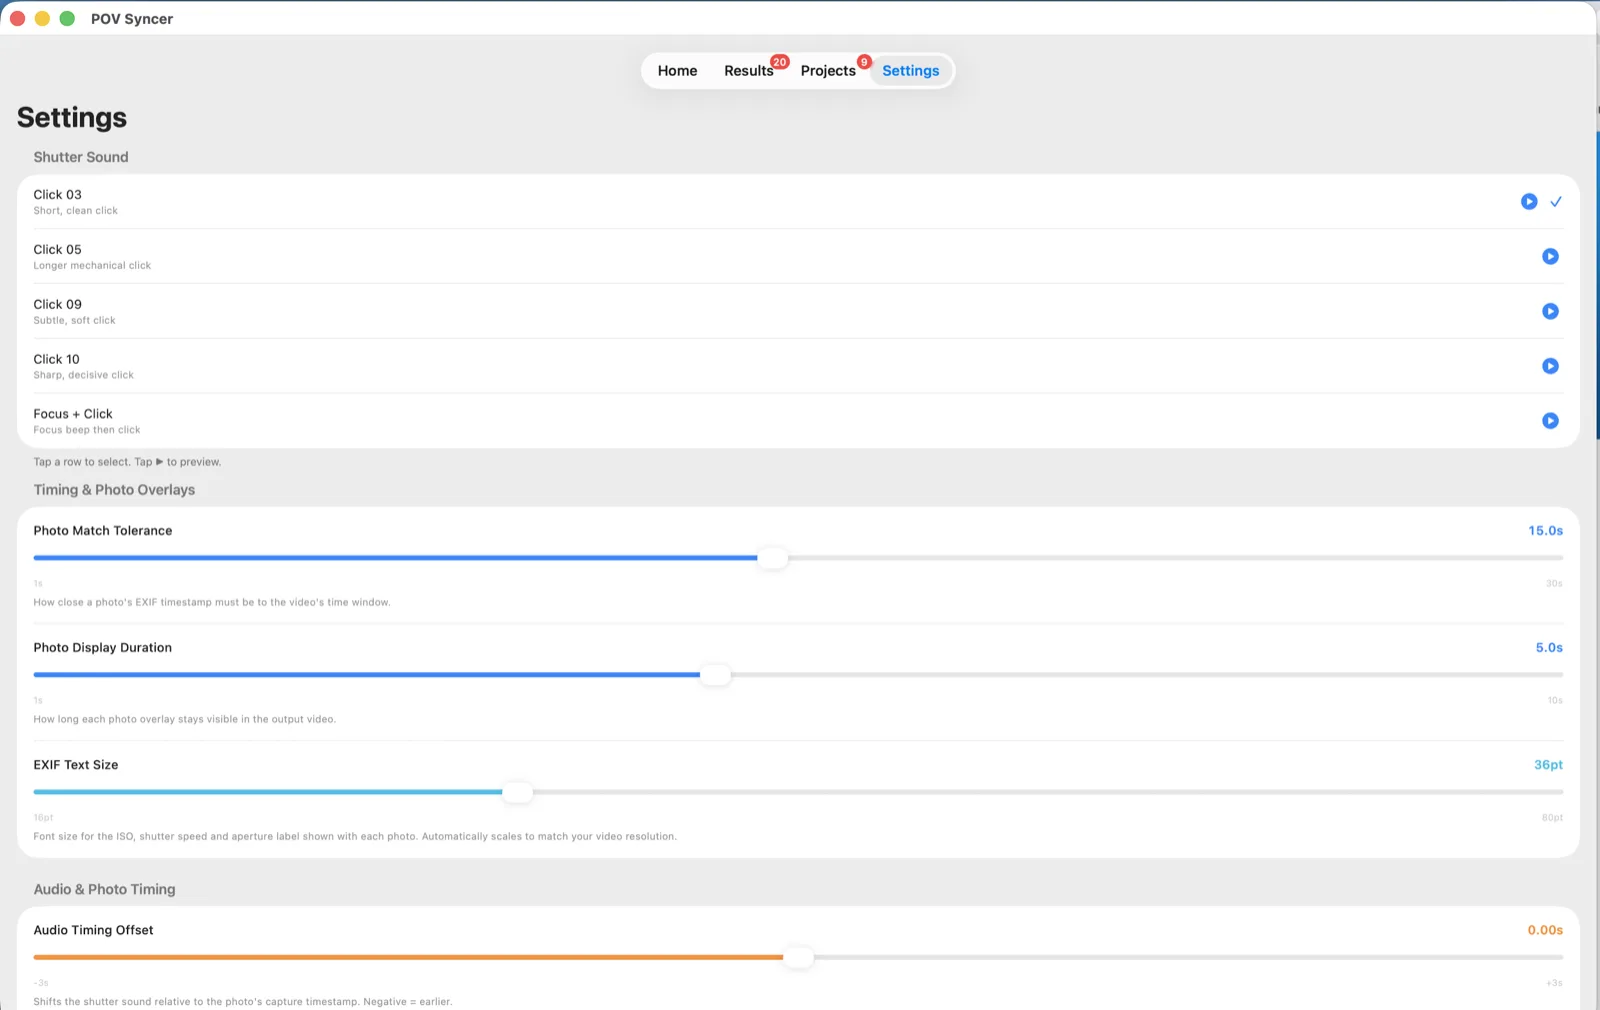
The Settings tab holds the global defaults applied to every video you process. The first group covers the Shutter Sound (tap a row to select, the ▶ button to preview) and Timing & Photo Overlays — Photo Match Tolerance (how close a photo's timestamp must be to a video moment), Photo Display Duration (how long each photo stays on screen) and EXIF Text Size.
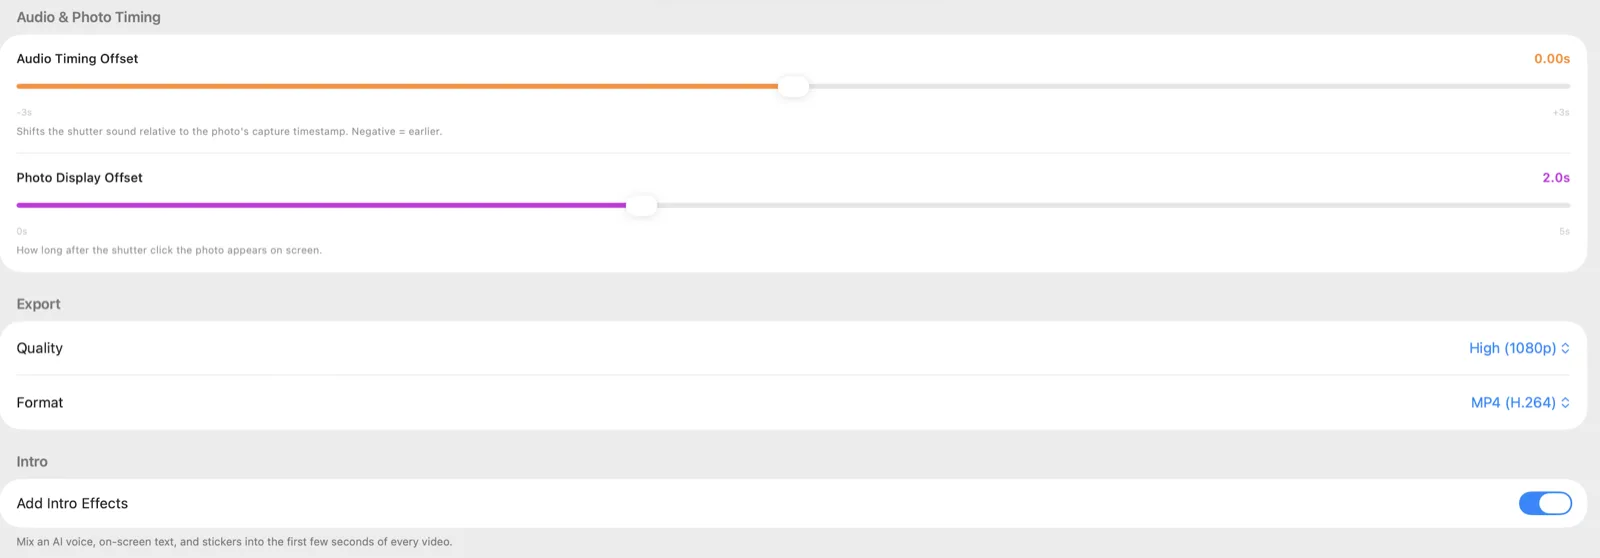
Further down, Audio & Photo Timing sets the global Audio Timing Offset and Photo Display Offset, and the Export section chooses your Quality (e.g. High 1080p) and Format (MP4 / H.264). The Intro toggle mixes an AI voice, on-screen text and stickers into the first few seconds of every video.
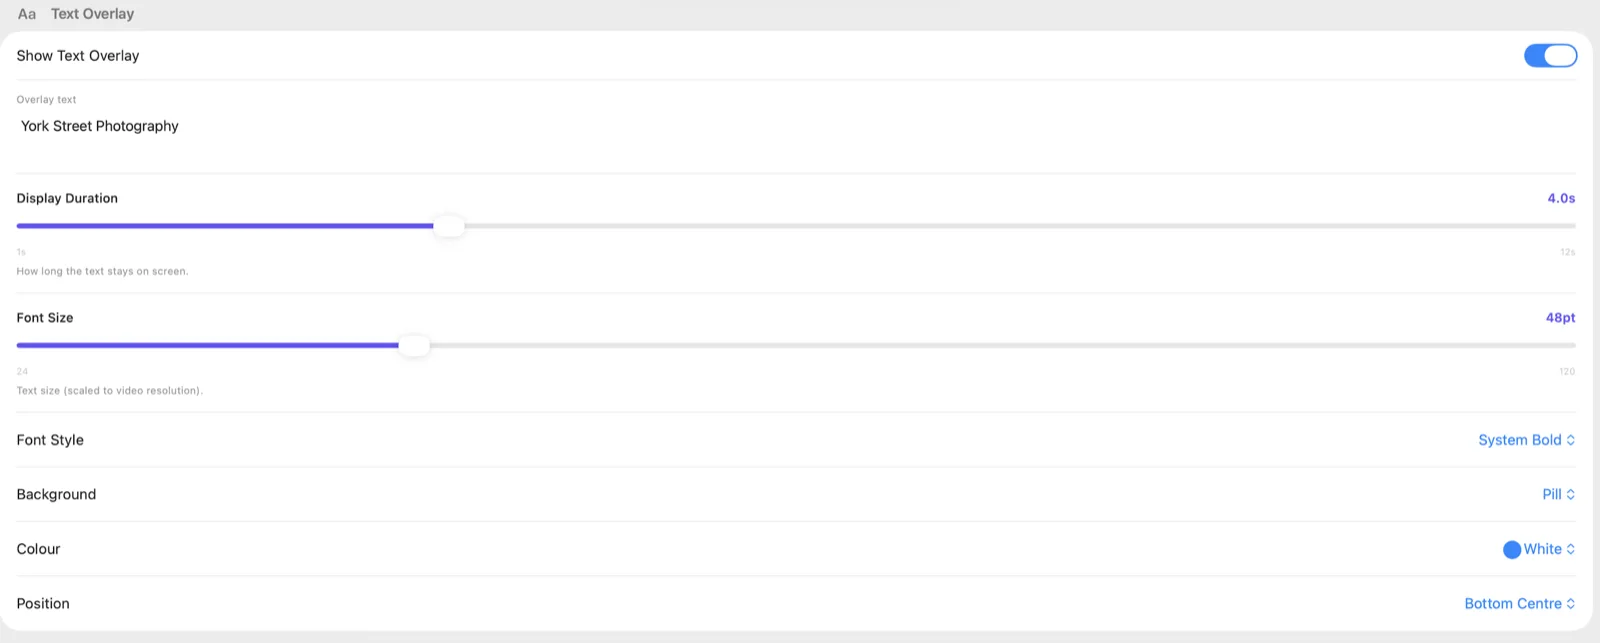
The Text Overlay section controls the default on-screen label — its text, Display Duration, Font Size, Font Style, Background (e.g. Pill), Colour and Position.
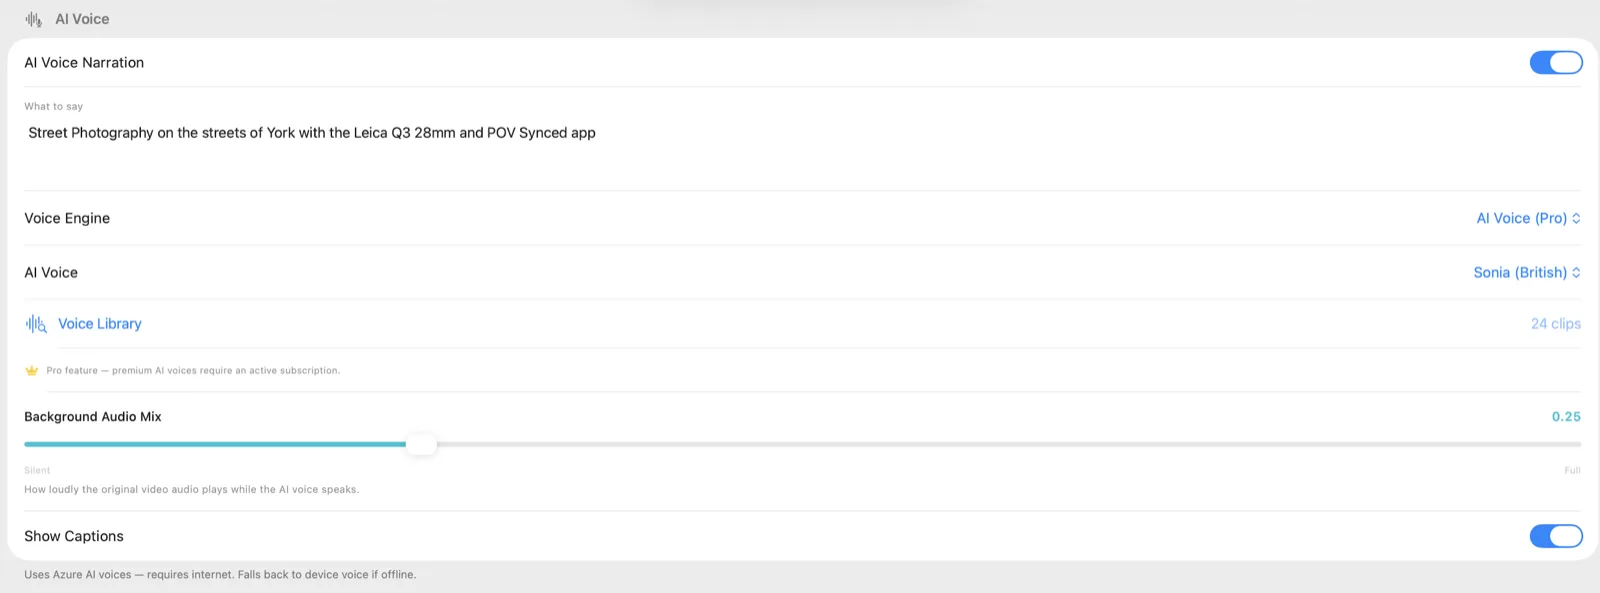
The AI Voice section sets the default narration: the script, the Voice Engine, the AI Voice itself, your saved Voice Library clips, the Background Audio Mix and whether to bake in Captions. AI voices use Azure neural voices and fall back to the device voice when you're offline.
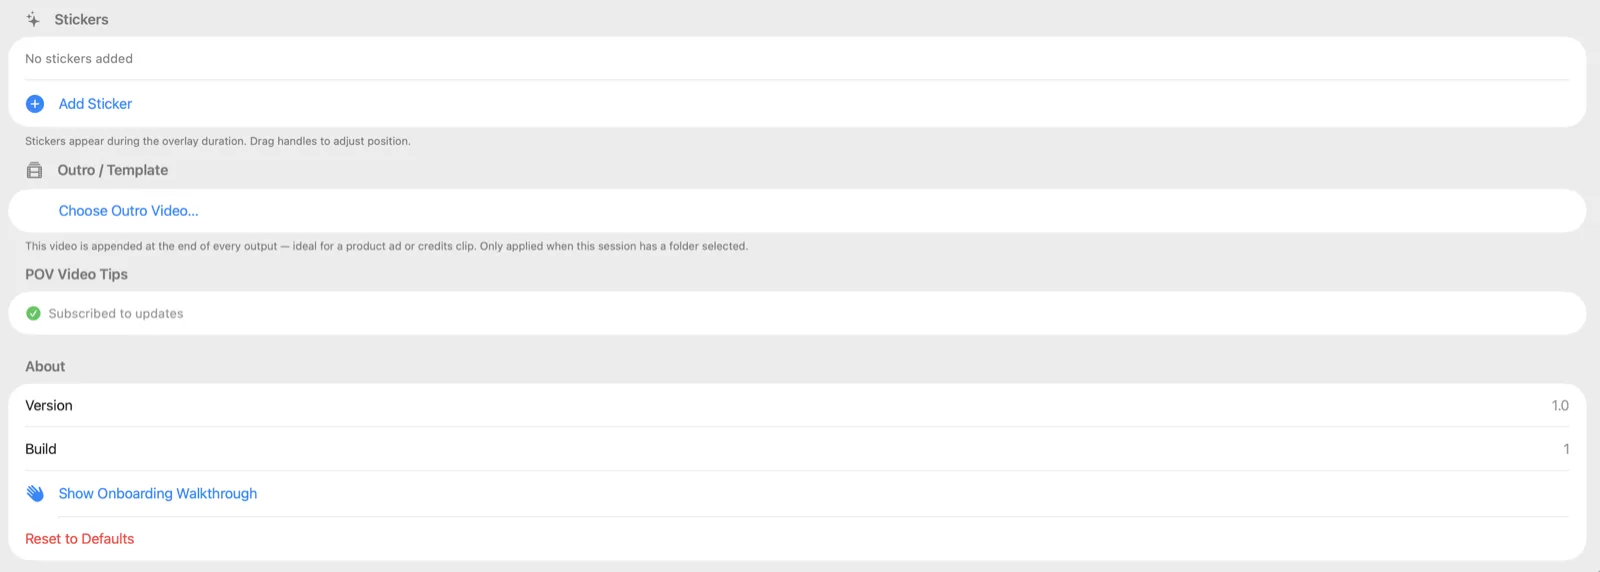
Finally, Stickers, an Outro / Template video (appended to every output — great for a credits or product clip), POV Video Tips updates, and an About section with the version, a Show Onboarding Walkthrough link and Reset to Defaults.
18. Send logs to support
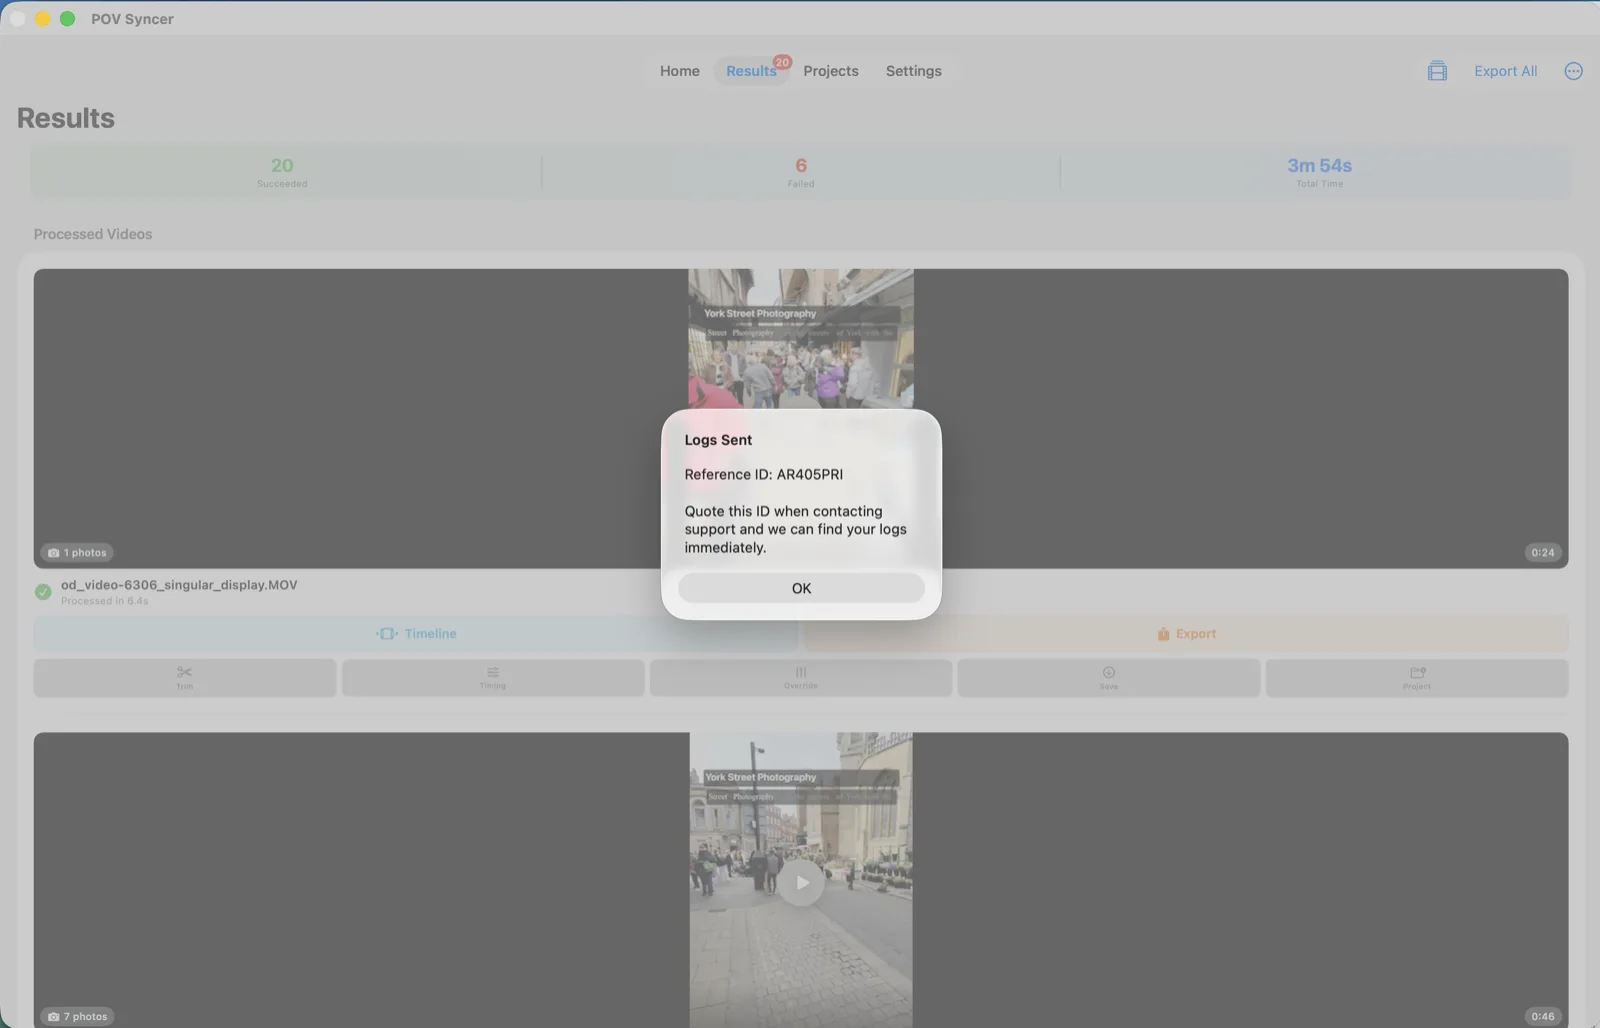
If videos fail to export or photos don't match the way you expect, you can send the diagnostic logs to support in one click. From the Results screen choose Share Logs, optionally describe what went wrong, and click Send. Only the log messages plus your device model and app version are uploaded — never your photos or video content.
You'll get a short Reference ID back. Quote it when you contact support and we can pull up your logs straight away.