A product photography BTS POV video makes that process visible: the setup, the styling decisions, the lighting refinements, and the finished product photographs appearing at their exact EXIF timestamps in the footage. For brands, it's content that contextualises their product. For other photographers, it's the most instructive product photography tutorial available. And with POV Syncer doing the EXIF matching automatically, creating that video adds under 15 minutes to the end of a session that was already producing finished work.
What Product Photography POV Videos Are
A product photography POV video combines footage of your studio session — setup, styling, lighting, shooting — with the finished product stills placed at their exact EXIF timestamps using POV Syncer. The viewer watches the entire product photography process: bare table becoming styled set, light modifiers being positioned, product being placed and adjusted, then the final photograph appearing at exactly the moment you pressed the shutter.
The format works particularly well for several product photography contexts:
- Flat lay / overhead product photography — the overhead action cam captures the entire table-top composition evolving, with the final overhead product photograph placed at the precise moment of capture.
- Beverage and food product photography — showing the condensation on the glass, the steam from the cup, the fresh arrangement that has a limited window before it wilts or shifts.
- Cosmetics and beauty product photography — the precise styling of reflective surfaces, the controlled lighting that eliminates reflections, the background texture selection.
- Lifestyle product photography — showing the environment being styled around the product for a contextual shot rather than a plain studio background.
Why Product Photographers Should Be Making This Content
Product photography is commercially driven in a way that few other genres are — your clients are brands, e-commerce businesses, and agencies, and your marketing needs to reach those audiences. BTS content from product photography sessions is effective marketing for three distinct reasons:
- Demonstrate expertise to potential clients. A brand manager watching a 60-second BTS video of a product photography session sees the lighting precision, the styling care, and the quality of the finished images in a single piece of content. It answers "what do I actually get for the fee?" more effectively than any portfolio.
- Serve the brand's own content needs. Brands increasingly use BTS content about their own products in their social media strategy. A BTS video of their product being professionally photographed is authentic brand content they'd happily share — extending your content's reach to their audience.
- Build an audience of product photographers. Product photography technique content is consistently popular in the photographer community. Lighting setup reveals, before-and-after styling comparisons, and equipment explanations attract an audience of photographers who may eventually become referral sources, workshop attendees, or clients.
Pick Your Action Cam Setup for Product Photography
Overhead Rig with GoPro (Flat Lay and Top-Down)
For flat lay product photography, mount a GoPro Hero 13 on an overhead photography rig (Glide Gear OH100 or similar) positioned above the shooting table. This gives you a straight-down view of the entire flat lay setup process — the background surface, the props being arranged, the product being positioned, and the progression from bare table to finished styled composition. The final flat lay photograph appears in the overhead GoPro footage at its exact EXIF timestamp.
Settings: 4K/30fps (60fps makes the footage feel more energetic for time-lapse-style fast-forward sections), Linear or SuperView for overhead flat lay (wide coverage of the table), GPS On, HyperSmooth off (the camera is stationary on the rig).
Insta360 GO 3S Clipped to Shoulder (Eye-Level Studio Work)
For product photography shot at eye level or at standard table height — packshots, cosmetics, lifestyle — an Insta360 GO 3S clipped to a jacket shoulder gives footage from roughly the same height as your eye when you're working at a shooting table. This is a natural perspective for the work and shows the hands-on process of product styling clearly.
Studio Stand-Mounted GoPro (Fixed Angle)
A GoPro on a small studio stand positioned at 45 degrees to the shooting table captures the entire scene — product, lighting, and photographer — from a fixed angle. This is the most documentary-style setup, showing the full context of a product photography session. Useful for content that's as much about the studio environment as about the product itself.
Insta360 X4 (Reframe to Any Angle)
The Insta360 X4 on a studio stand captures 360-degree footage that you can reframe in post to any angle — overhead, eye-level, 45-degree side, or dynamic movement between angles. For product photography BTS content aimed at brands, the ability to show multiple perspectives of the same session from a single camera position is powerful.
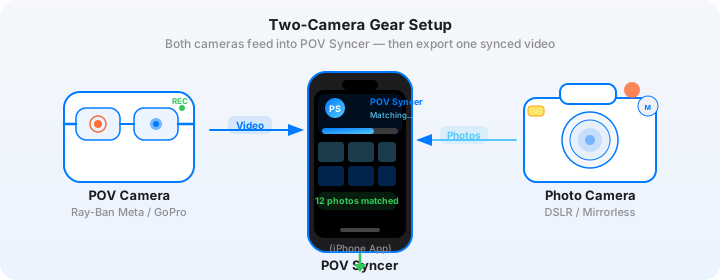
The Gear: Action Cam + Product Camera
GoPro Hero 13 on Overhead Rig + Fujifilm X-T5 with XF 80mm f/2.8 R LM OIS WR Macro
The Fujifilm X-T5 at 40.2MP APS-C is exceptional for product photography — its resolution captures fine product details, textures, and surface qualities with genuine fidelity. The XF 80mm macro lens gives you 1:1 reproduction ratio for close-up product detail shots alongside the standard working-distance product shots. Fujifilm's JPEG film simulations (Velvia for colour-rich products, Eterna for lifestyle work) give you files that often require minimal post-processing. Connect via Fujifilm XApp for GPS-referenced EXIF clock sync.
Settings for product photography: RAW + JPEG, f/8–f/11 for flat lay depth of field, manual exposure with studio flash sync at 1/125s or 1/160s, ISO 100 for maximum quality, Manual White Balance set for your light source colour temperature.
Insta360 GO 3S on Shoulder + Sony A7 III with FE 90mm f/2.8 Macro G OSS
The Sony A7 III at 24.2MP full-frame with the 90mm macro is a versatile product photography combination — the full-frame sensor's natural depth of field at f/4 to f/5.6 gives your product shots a more three-dimensional rendering than the APS-C equivalent. The 90mm focal length is excellent for avoiding the slight distortion that shorter macro lenses introduce at close distances. Sony Imaging Edge Mobile provides GPS clock sync.
DJI Action 5 Pro on Studio Stand + Canon R7 with RF-S 18-150mm f/3.5-6.3 IS STM
For product photographers who need versatility across different product types and sizes in a single day, the Canon R7 with the RF-S 18-150mm covers everything from full-product environmental shots to moderate close-ups. The R7's APS-C sensor and Canon's excellent subject detection AF make it fast to work with for multi-product catalogue shoots.
Manual Editing: The Hidden Time Cost of Product Photography Content
Product photography sessions are meticulous by nature — you might take 20 photographs at one angle alone, adjusting styling between each shot. A typical 90-minute product session produces 60 to 100 stills. Finding each of those 60 to 100 photos in the action cam footage manually would take 30 to 60 minutes minimum. For a photographer producing BTS content from every session, that's time they simply don't have.
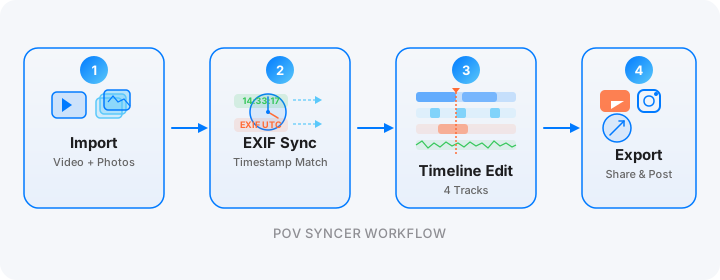
POV Syncer's EXIF matching handles all 100 stills in seconds. You then select the 8 to 10 photographs that tell the most compelling story — typically: bare background, first product placement, styling iteration 1, lighting adjustment, final pre-shot styling, and the 2 to 3 best final photographs. The narrative arc of those 8 to 10 photographs, placed automatically in the session footage, tells the complete product photography story.
The Full Workflow in POV Syncer


On the timeline: use the title track to add lighting spec overlays for photographer-audience content ("1 key — 90cm Octobox | 1 fill — silver reflector | 1 rim — gridded strip"). Add a brief AI narration about the styling choice: "The challenge here was controlling the reflection on the bottle glass without losing the product colour — I used a large silver reflector at 45 degrees and an egg-crate grid on the key light." Export 9:16 for Reels, or 1:1 for Instagram feed posts that show the process alongside your product portfolio.
Show the process behind the perfect product shot
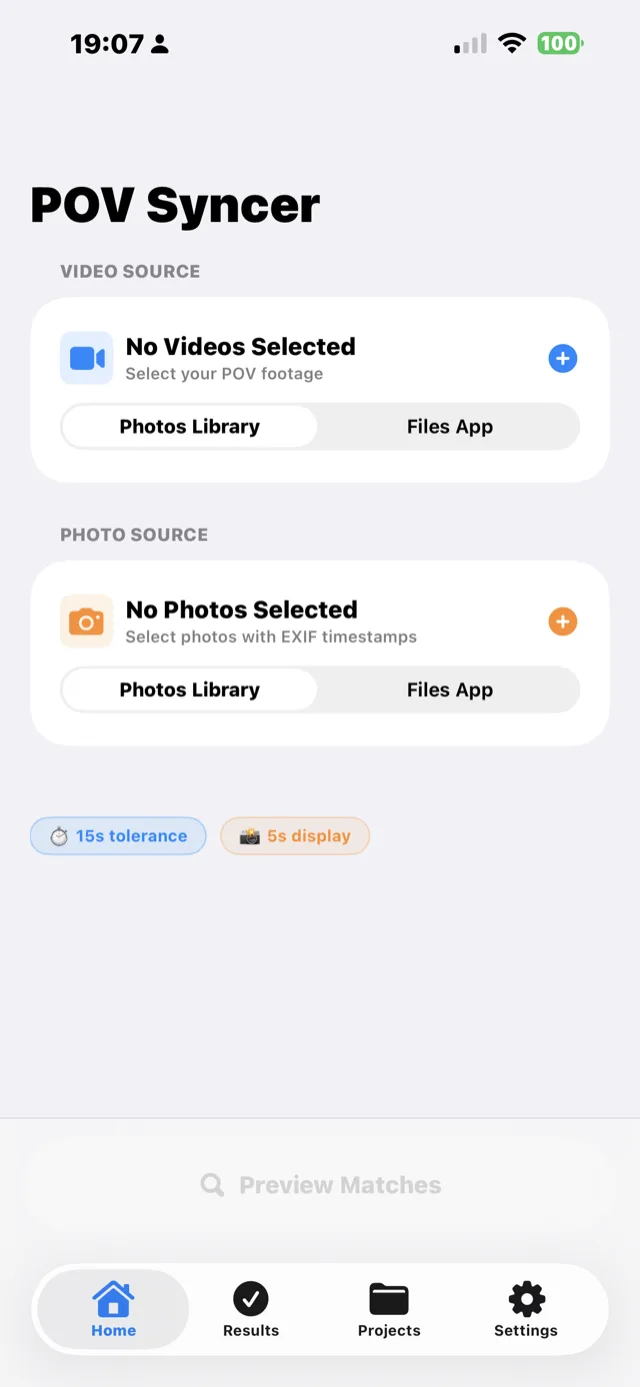
POV Syncer is free during beta. Import your overhead footage and product stills. Automatic EXIF matching places every photograph at the moment it was captured — in seconds.
Download POV Syncer FreeWorks on iPhone, iPad, and Mac
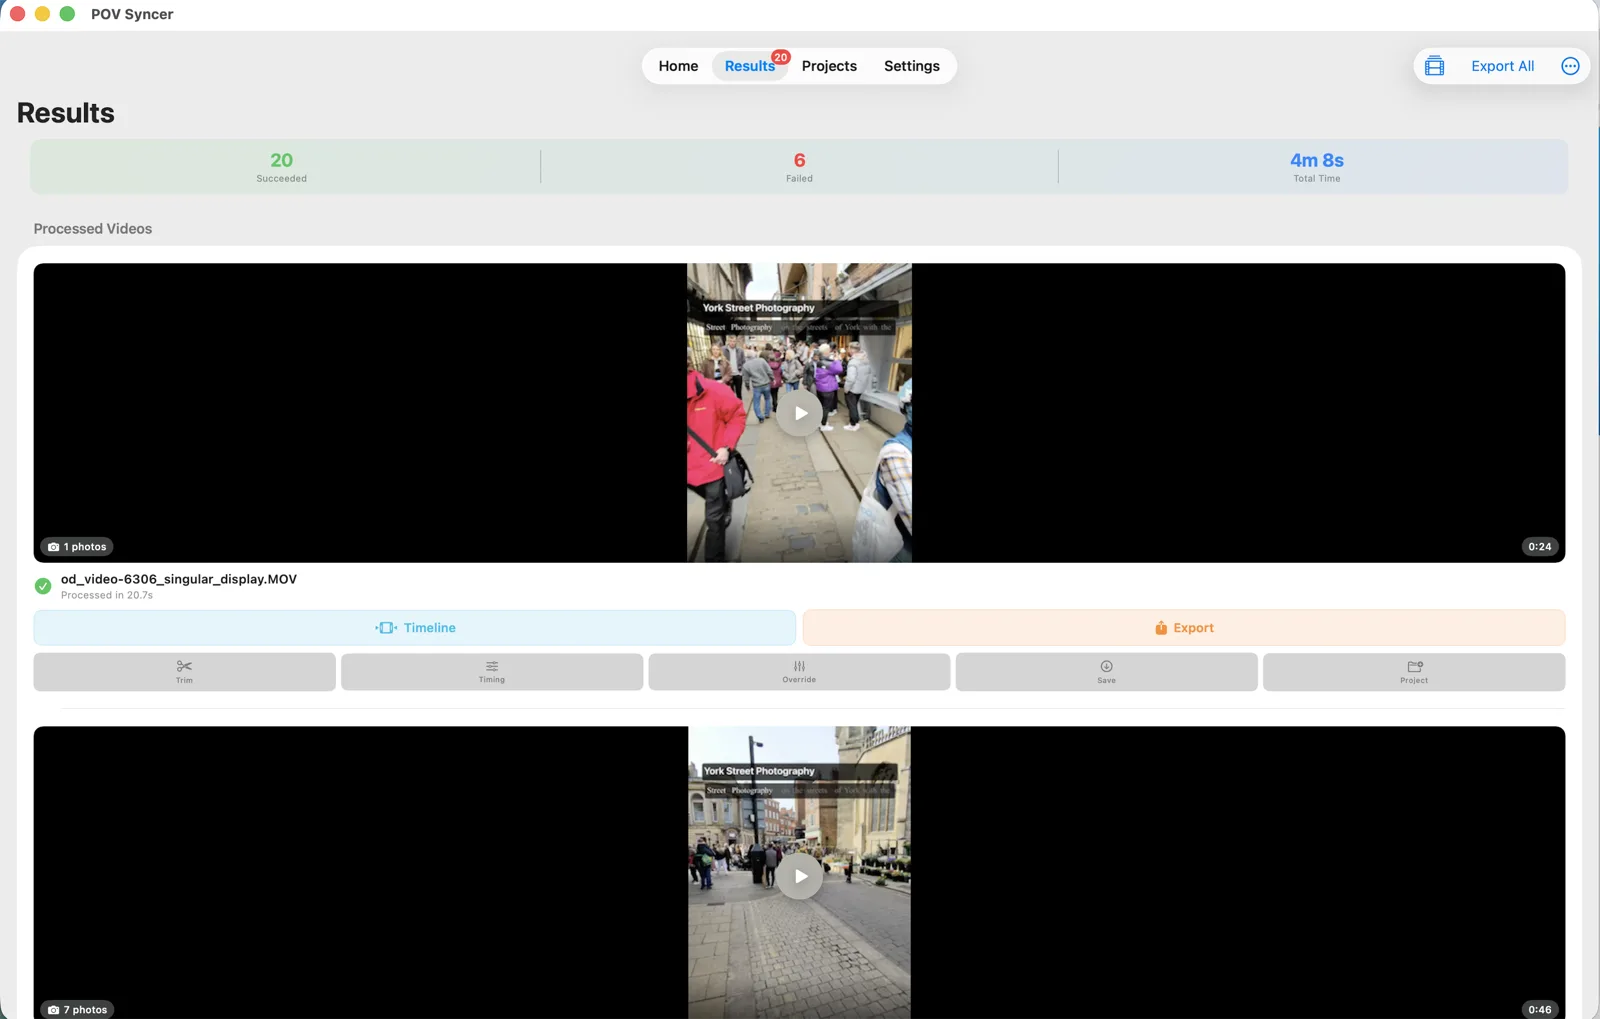
For studio product photographers, the Mac workflow integrates naturally with an existing desktop post-processing workflow. Import GoPro footage from the card reader, import product JPEGs from the camera card, let POV Syncer match and process, then open the timeline editor for final polish. Export directly to your delivery folder. On iPad during the session itself, you can review the Match Preview in real time — useful for catching clock sync issues before you pack up the studio.
Under the Hood: EXIF Matching in Studio Conditions
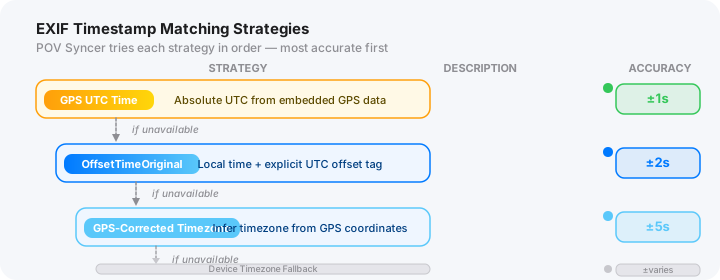
Studio product photography has the same indoor GPS challenge as real estate photography. The reliable workflow:
- Connect your product camera to its companion app before the session (ideally near a window with GPS signal) and sync the clock. Set UTC offset carefully.
- GoPro Hero 13 GPS records absolute UTC time for the video side, even if acquired initially outside and then brought indoors.
- OffsetTimeOriginal matching aligns the stills UTC offset against the GoPro GPS UTC reference.
- Adjustable tolerance ±5 seconds is appropriate for product photography where the "decisive moment" is less precise than in street or concert photography.
Six Tips for Product Photography POV Videos
1. Include Client Product Footage Only with Permission
Before recording BTS footage for any commercial product session, get explicit written consent from the client brand. Many brands are happy for BTS content — it's free marketing for their product. Some have strict brand guidelines about how their products appear in "unofficial" contexts. When in doubt, ask specifically. "I'd like to create a behind-the-scenes video of this session for my social media — would you be comfortable with that?" is a simple, direct question that most clients appreciate being asked.
2. Capture the Bare Setup Before Any Props Are Added
The most instructive opening for a product photography BTS video is the bare background with nothing on it — then watch the composition build. Start the action cam recording before you touch any props. The sequence from nothing to finished composition is the story of every product photo, and it's genuinely fascinating to watch even for non-photographers.
3. Show the Iterations, Not Just the Final Arrangement
Product styling involves multiple iterations — this prop, then a different prop, then no prop, then the original arrangement with a small adjustment. Each iteration is a decision, and the decisions are more instructive than the final result. Don't cut around the iterations: they show your professional judgment in action.
4. Use the Title Track for Lighting Specifications
For photographer-audience content, lighting specifications are the most-watched element of any BTS video. Use POV Syncer's title track to overlay the lighting setup as text over the footage: "Key: 90cm round softbox, 1m camera right, −1EV | Fill: white V-flat, 2m camera left | Rim: gridded beauty dish, camera right rear". This information appears naturally over the action cam footage without requiring a narration that talks over the setup.
5. Use the Before-After Format for Maximum Impact
One of the most effective product photography BTS formats is the before-after: bare table with harsh single light, then the same table with the full softbox setup. Or a product on a plain background, then the same product in a lifestyle context. POV Syncer's title track lets you add "Before" and "After" labels. This format consistently performs well on Reels because it has a clear visual payoff.
6. Make the Export the Client Deliverable Add-On
For commercial product clients, offer the BTS video as an optional add-on deliverable — a behind-the-scenes Reel of their product being photographed, delivered alongside the finished stills. Many brands want this content for their own Instagram and want it professionally produced. This is a natural premium add-on that takes 15 minutes of additional work via POV Syncer and has genuine commercial value to the brand.