Quick Start: Your First POV Sync
From opening POV Syncer to a finished, shareable video in five minutes. We'll use a Ray-Ban Meta walking session as the example.
What you'll need
- POV Syncer installed (free download from the App Store)
- A POV camera video on your iPhone — Ray-Ban Meta, GoPro, DJI, or any clip with a creation date
- A handful of photos taken during the same session (Photos library or Files)
- iOS 16 or later
What POV Syncer is going to do
POV Syncer reads the EXIF DateTimeOriginal embedded in each of your photos and matches it against the time range of your video. At each match point, the rendered output plays a camera shutter click, then fades the photo full-screen for a moment before resuming the video.
The whole point: you don't drag anything onto a timeline by hand. The app figures out which photo belongs where.
Open POV Syncer
Launch the app from your home screen. On first run you'll see the onboarding walkthrough — tap through it; we'll cover the details in later tutorials. You'll land on the Home tab.

Add your video
Tap Add Video in the top card. Pick Photos Library — the system picker opens. Select your Ray-Ban Meta clip (or whichever POV video you're working with), then tap Add.
POV Syncer doesn't load the video bytes yet — it just remembers which clip you picked. The actual file copy happens later, which is why this feels instant even with long clips.

Add your photos
Tap Add Photos in the second card. The picker opens again — this time pick the photos you took during the same session. Tap each one to add it, or tap-and-drag-left to range-select a batch. The picker accepts up to 2,000 photos in one go, so go wide.

Preview the matches
The big blue Preview Matches button at the bottom is now active. Tap it.
The app reads each photo's EXIF timestamp, compares it to your video's start/end times, and shows you a card for each video with a timeline strip of blue dots — one dot per matched photo. Tap any card to expand it and see the exact filenames and timestamps.
If you're happy with what you see, tap Start Processing. If not, the tolerance slider at the top lets you widen or narrow the matching window (default ±15 seconds).

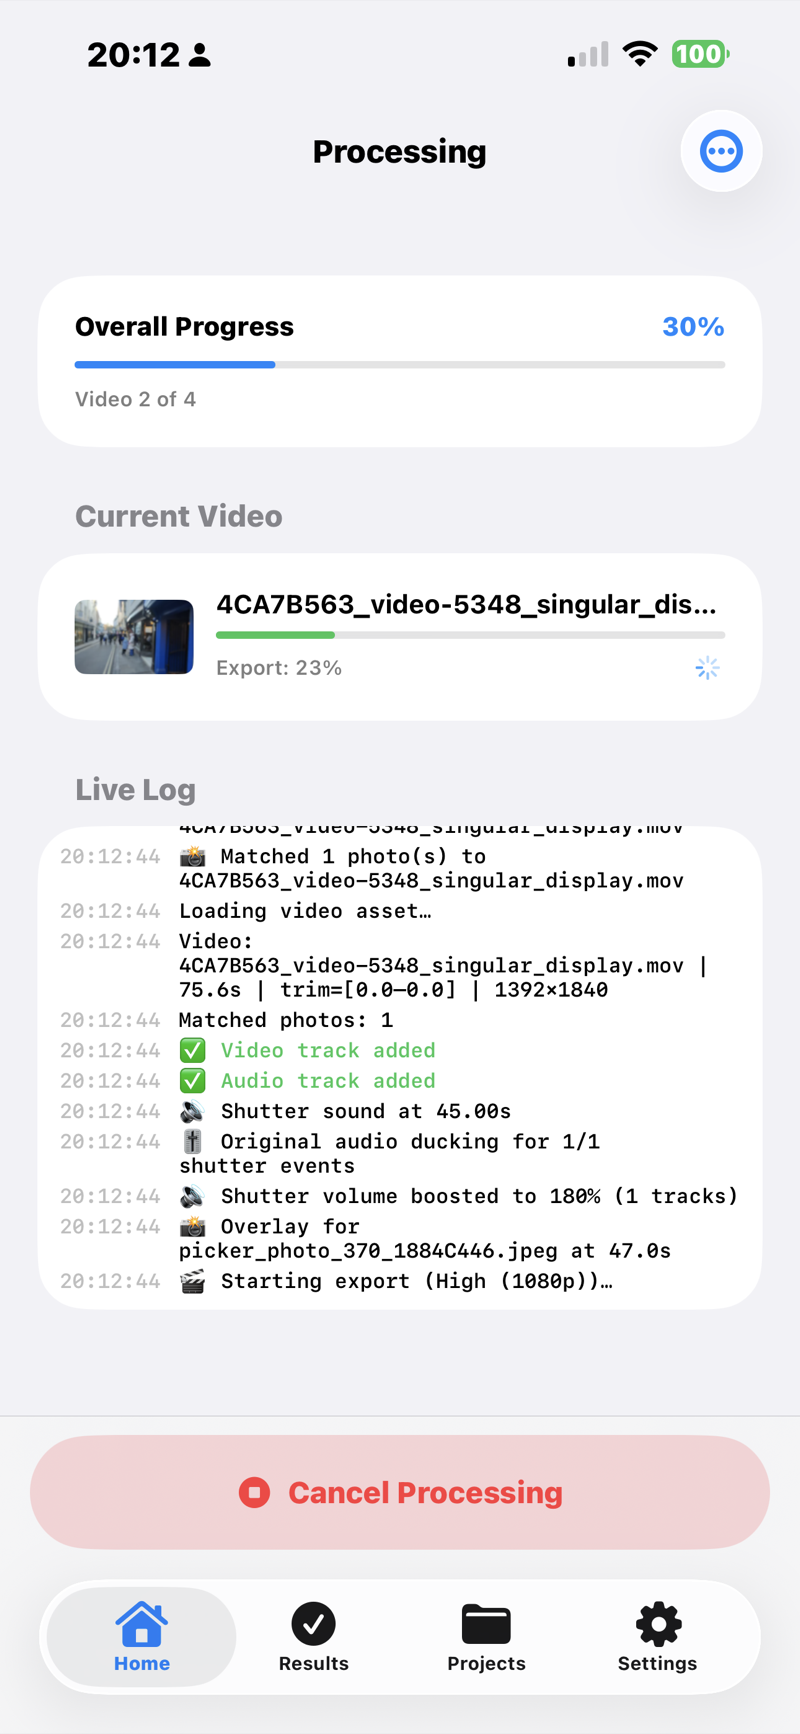
Wait for it to render
The Processing screen shows a per-video progress bar plus a live log stream. Each video is rendered sequentially — composition, then export. On an iPhone 15 Pro Max, a typical 2-minute Ray-Ban Meta clip with 10 photo overlays takes about 30–60 seconds.
Tap "View Results"
When all videos finish, a big green View Results button appears at the bottom. Tap it. You'll land on the Results tab with a card per rendered output — thumbnails, durations, file sizes, and a Save button for each one.
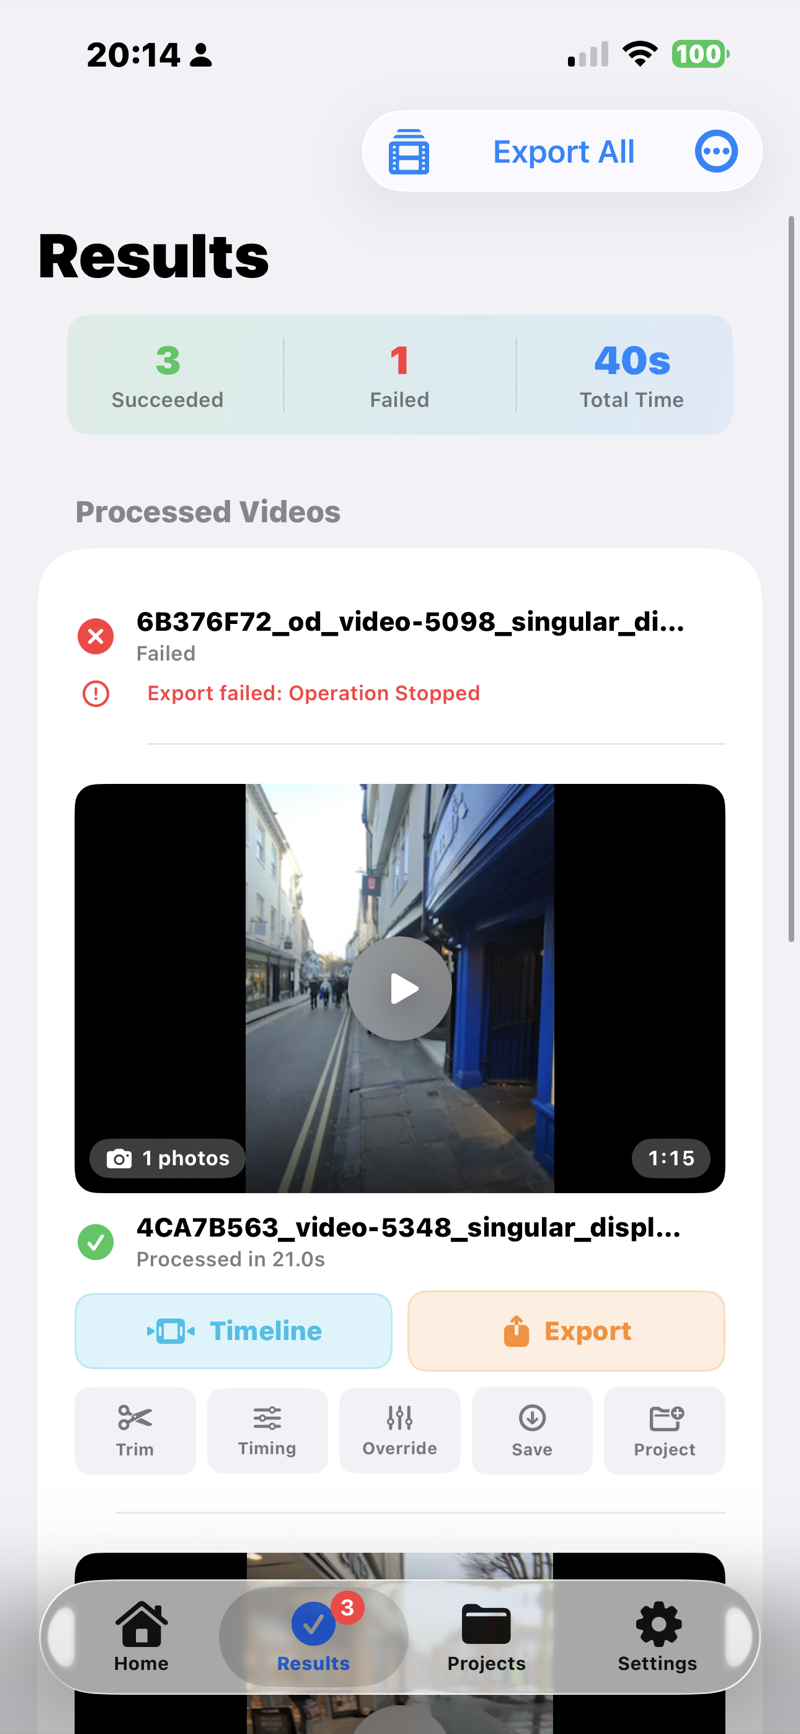
Save to Photos and share
Tap Save on the result card to write the MP4 into your Camera Roll. From there it's yours — drag it into TikTok, Instagram Reels, YouTube Shorts, AirDrop to your Mac, whatever.
For a one-tap upload, use the social export icon next to Save — POV Syncer has presets that pre-fit the right aspect ratio for TikTok, Reels, and Shorts.

That's it
You just produced a synced POV video without touching a timeline. For most casual posts, this is the whole workflow.
Want to go further? The tutorials below cover everything POV Syncer does — from the timeline editor to AI voice narration to handling iCloud-not-downloaded photos.